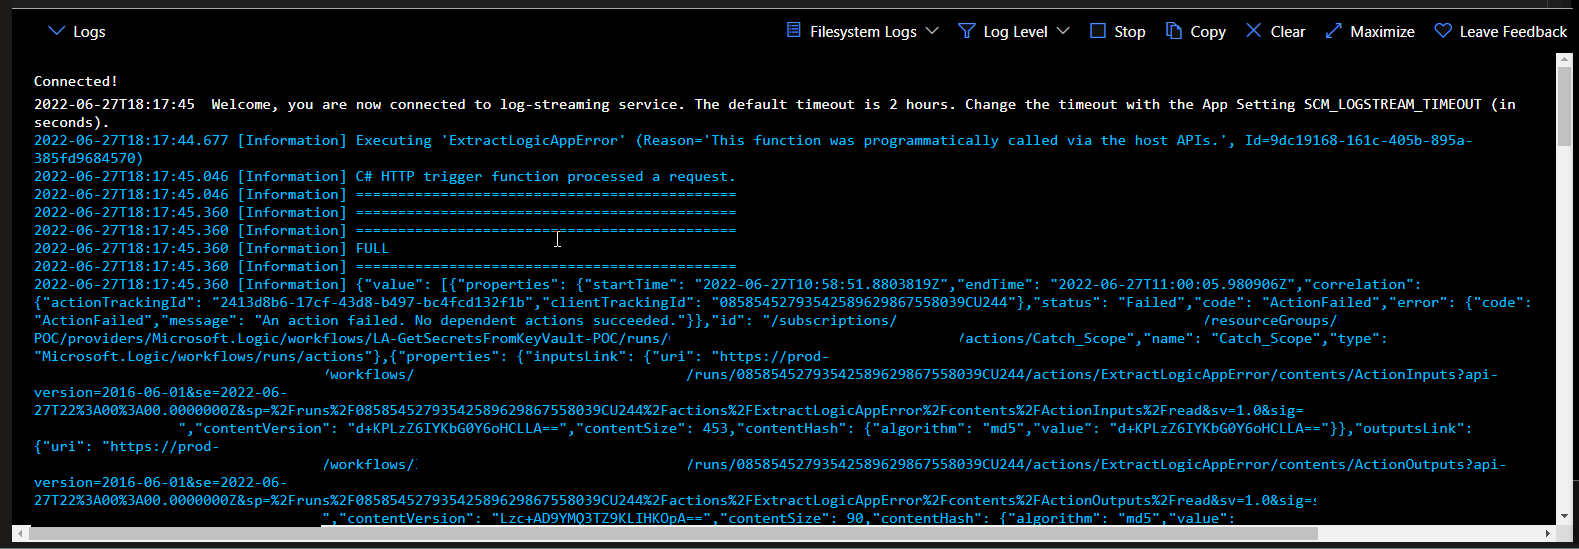
Sometimes it may not be easy to debug Azure Functions deployed on Azure since we cannot do inline debug through the Azure Portal. An option for us is to write information to the Logs console in key parts of our code to get insights into what’s happening inside our Function. We can do that using the following sentence:
- log.LogInformation(“C# HTTP trigger function processed a request.”);
Another option, especially if we are developing our Azure Functions inside Visual Studio, is to run the Function locally. We can easily do that by clicking the play button:

Click F5 or from the menu, select the option Debug > Start Debugging:

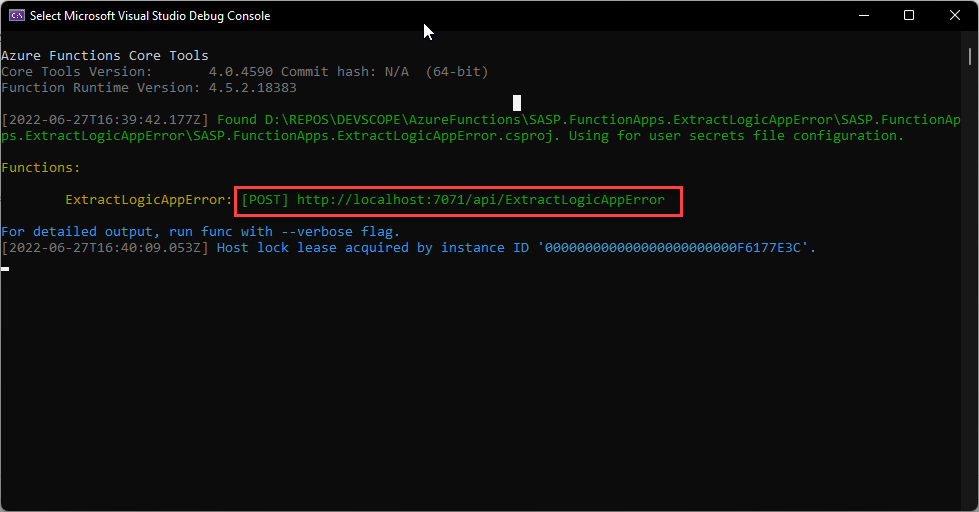
It will open a Microsoft Visual Studio Debug Console that will start the Azure Function Runtime. When ready, it will provide a URL that you can use, for example, in Postman, to submit a request to our Function locally:
But sometimes, that can be enough, and we want to see strange behaviors that could happen once we deploy to Azure. So, in addition to all these previous logging and debugging capabilities, we can also do remote debugging on our Azure Functions. To do that, we need to:
- Deploy/publish our Azure Functions on debug configuration mode (not release otherwise we will face some issues)
- Set breakpoints inside our code
- Configure our Azure Function App to allow remote debugging
- Start debugging by attaching to a w3wp.exe remote process
- Submit a message to your HTTP trigger Azure Function
Deploy/publish our Azure Functions on debug configuration mode (not release: otherwise, we will face some issues)
In this step, you will publish our Azure Function from our Visual Studio project to an existing Azure Function App you provisioned in Azure. The easier way to deploy our Azure Functions is to:
- On the Azure Portal, access your Azure Function App, and from the Azure Function App menu select the option Get publish profile
- It will download a <function-app-name>.PublishSettings that we will be using to configure our publish profile inside Visual Studio.
- Open your Azure Function Visual Studio project
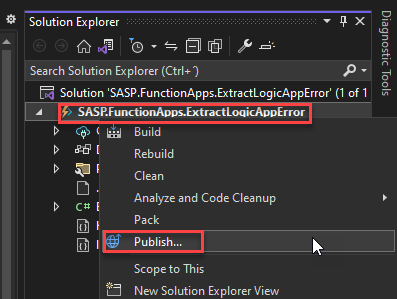
- Right-click on the project name and from the context menu select Publish
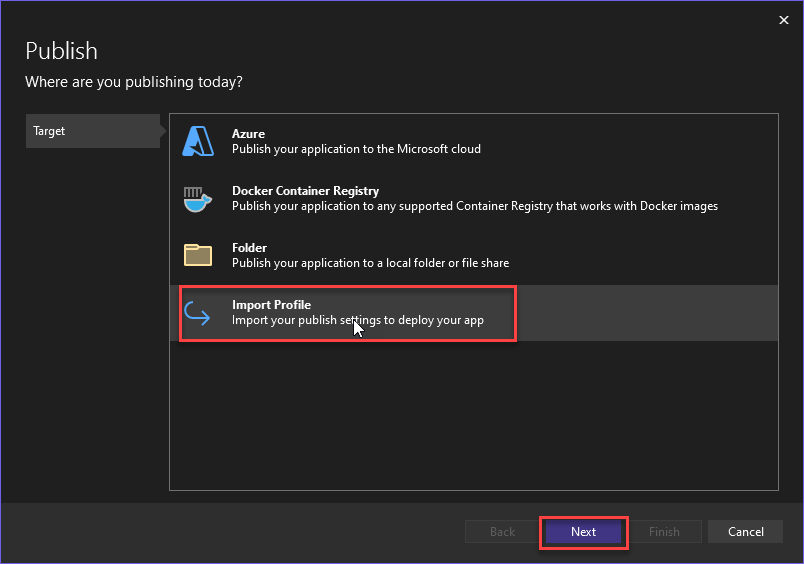
- If you don’t have a Publish profile, this will open a Publish window for you to select where you want to publish. We will choose the option Import Profile and click Next
- On the Import publish settings file window, browse and choose the <function-app-name>.PublishSettings that we previous download and select Finish
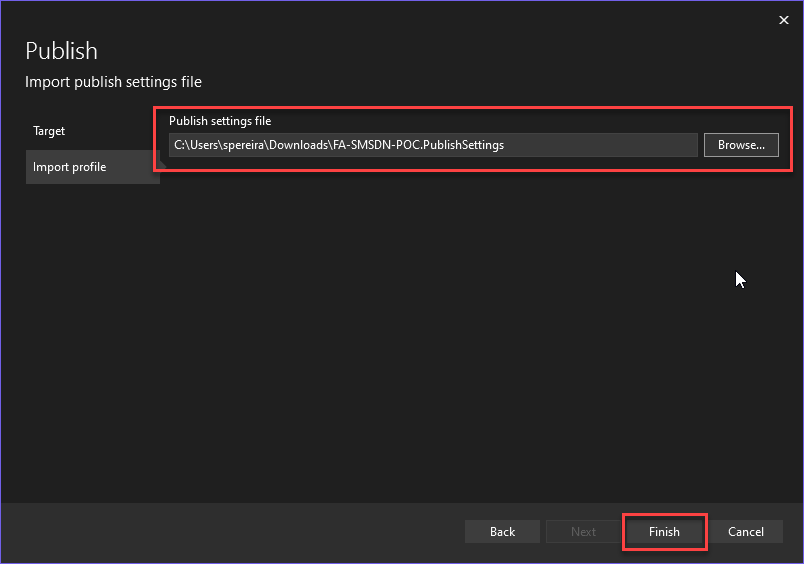
- These steps will create a Publish profile for us.
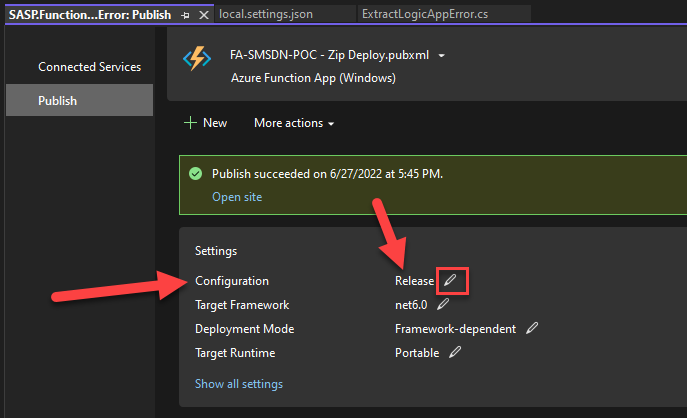
- Now on the Publish profile window, we need to edit the Configuration option in the Settings panel to publish our Function in Debug mode. We can do that by clicking the Edit button.
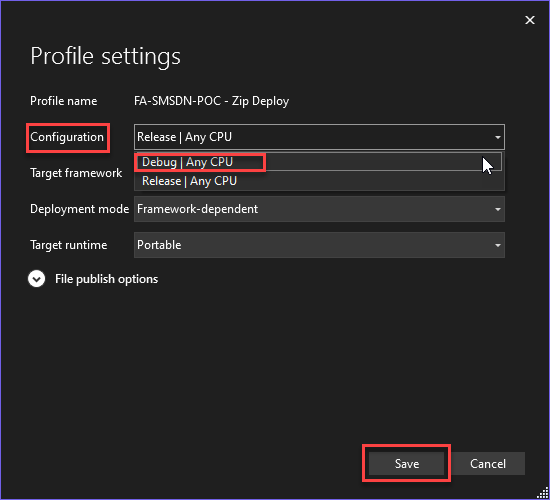
- On the Profile settings window, on the Configuration dropbox select the option Debug | Any CPU and click Save.
- And finally, click the Publish button on the top right corner.

In the end, if everything goes well you receive a Publish success message as you see in the above picture.
Set breakpoints inside our code
As always, you need to go inside your code and see breakpoints:

Configure our Azure Function App to allow remote debugging
By default, the debug remote feature is disabled on our Azure Function Apps, and we need to enable it to be able to accomplish this task. To do that, we need to:
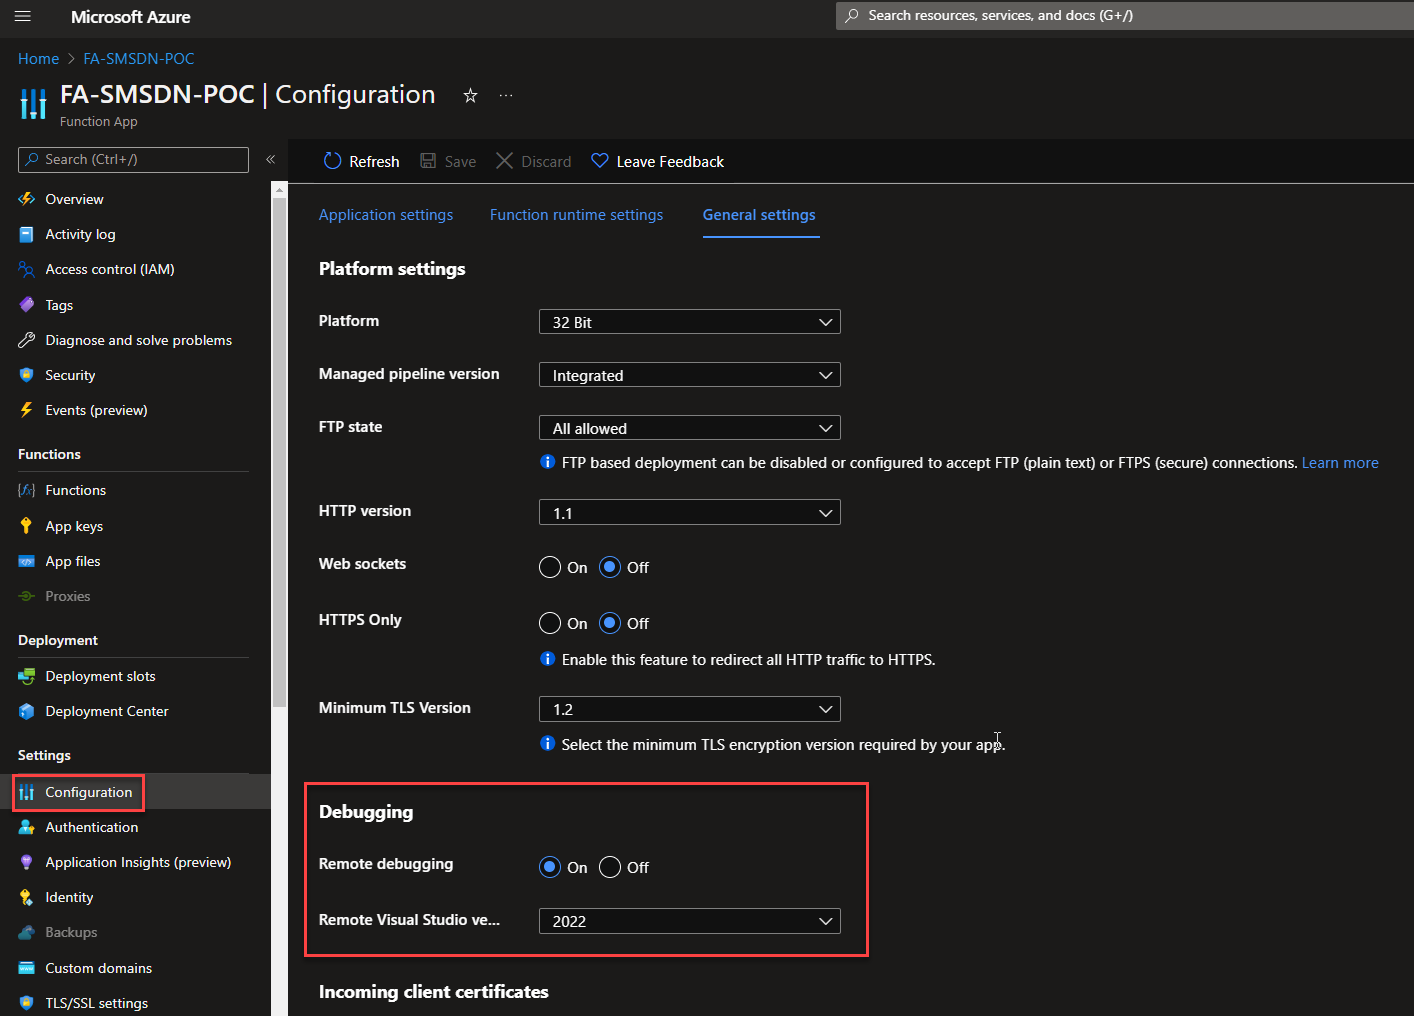
- On the Azure Portal, access your Azure Function App, from the left context menu select the option Configuration present in the Settings section
- On the Configuration page, select the General option settings from the top menu
- And on the General settings page, on the Debugging section
- On the Remote debugging property select the option On
- On the Remote Visual Studio version property, from the dropbox select the Visual Studio version you are using, in my case 2022.
Start debugging by attaching to a w3wp.exe remote process
In resume, for us to be able to remote debug you need to guarantee that:
- At least one breakpoint is setup
- Our DLL compile and publish on Azure should be on Debug
- The DLL version published on Azure should match the local version
So, back to our Visual Studio solution:
- On the Publish profile window, select the Open site that will be available once you publish the Azure Function to Azure.

- It will open the Function App webpage in your browser. Leave the browser open.

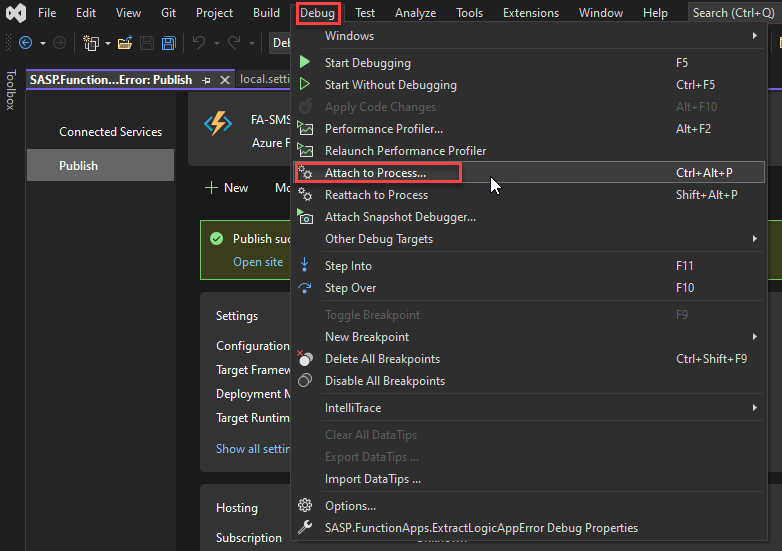
- After the Web App opens in the browser, return to Visual Studio and click on Debug > Attach to Process
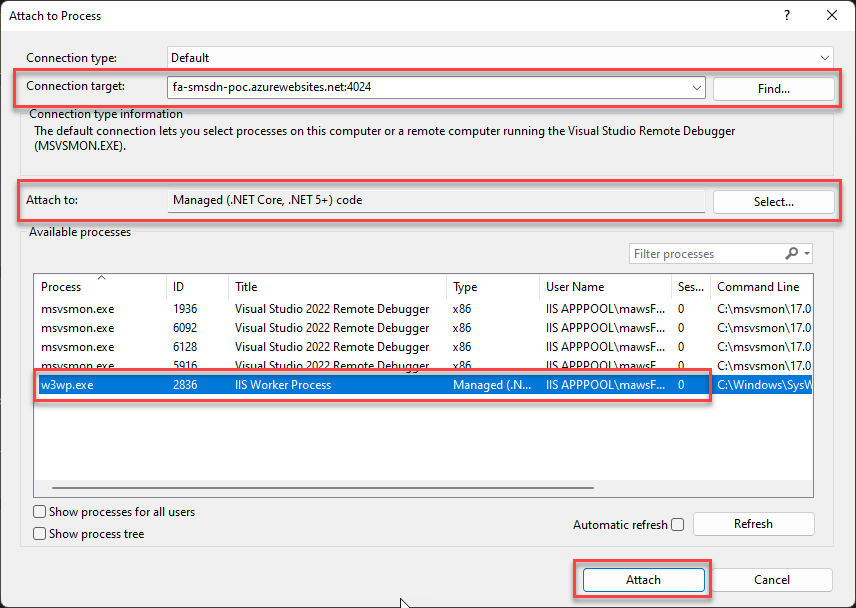
- On the Attach to Process window, on the Connection target, we need to enter the URL (without the https://) and the port number which should be 4024
- In my case, it is: fa-smsdn-poc.azurewebsites.net:4024
- You can get this URL on the Azure Portal on the overview page of your Azure Function App

-
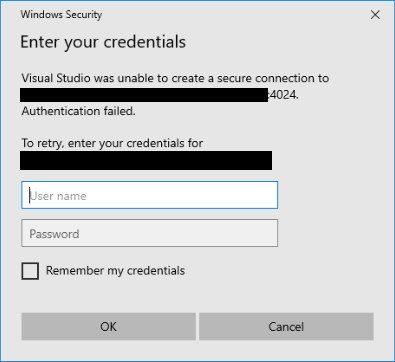
- On the first time, it will probably prompt a window for you to authenticate asking you for a Username and Password. You can access the values of the username and password to use on your <function-app-name>.PublishSettings that we download earlier on the userName and userPWD attributes of the publishProfile element.
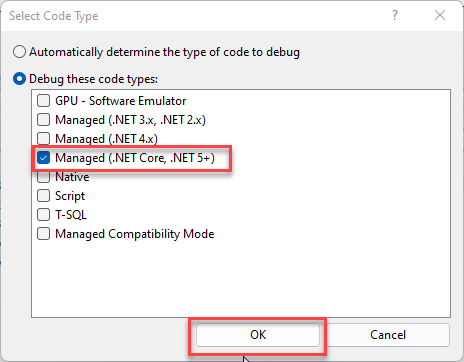
- On the Attach to Process window, on the Attach to property, click on the Select button and select the option Managed (.Net Core, .NET 5+). Click OK.
- Of course, this can be adjusted depending on your version.
- Finally, from the Available processes, select the w3wp.exe and click Attach.
Once you click, Attach, you enter debug mode.

Submit a message to your HTTP trigger Azure Function
To finish, we need to submit a message to our Azure Function. You can easily accomplish this on the Azure Portal:
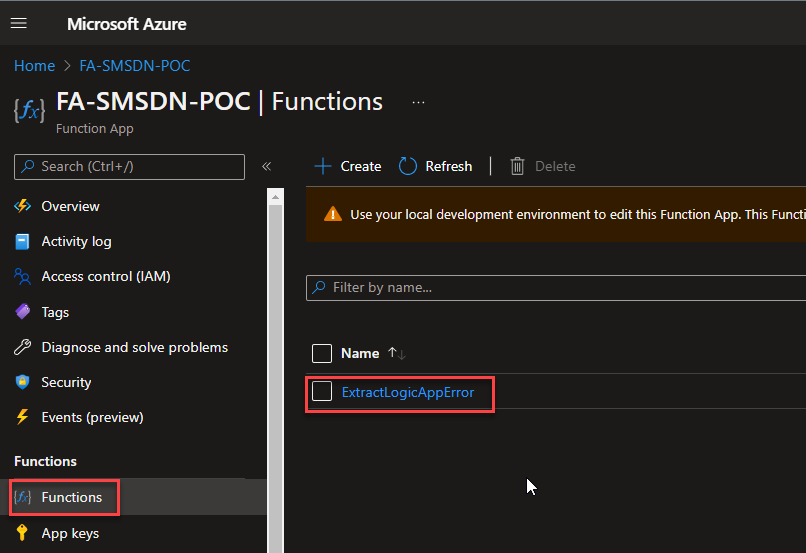
- On the Azure Portal, access your Azure Function App, from the left context menu select the option Functions present in the Functions section
- On the Functions page, select the Function you want to debug
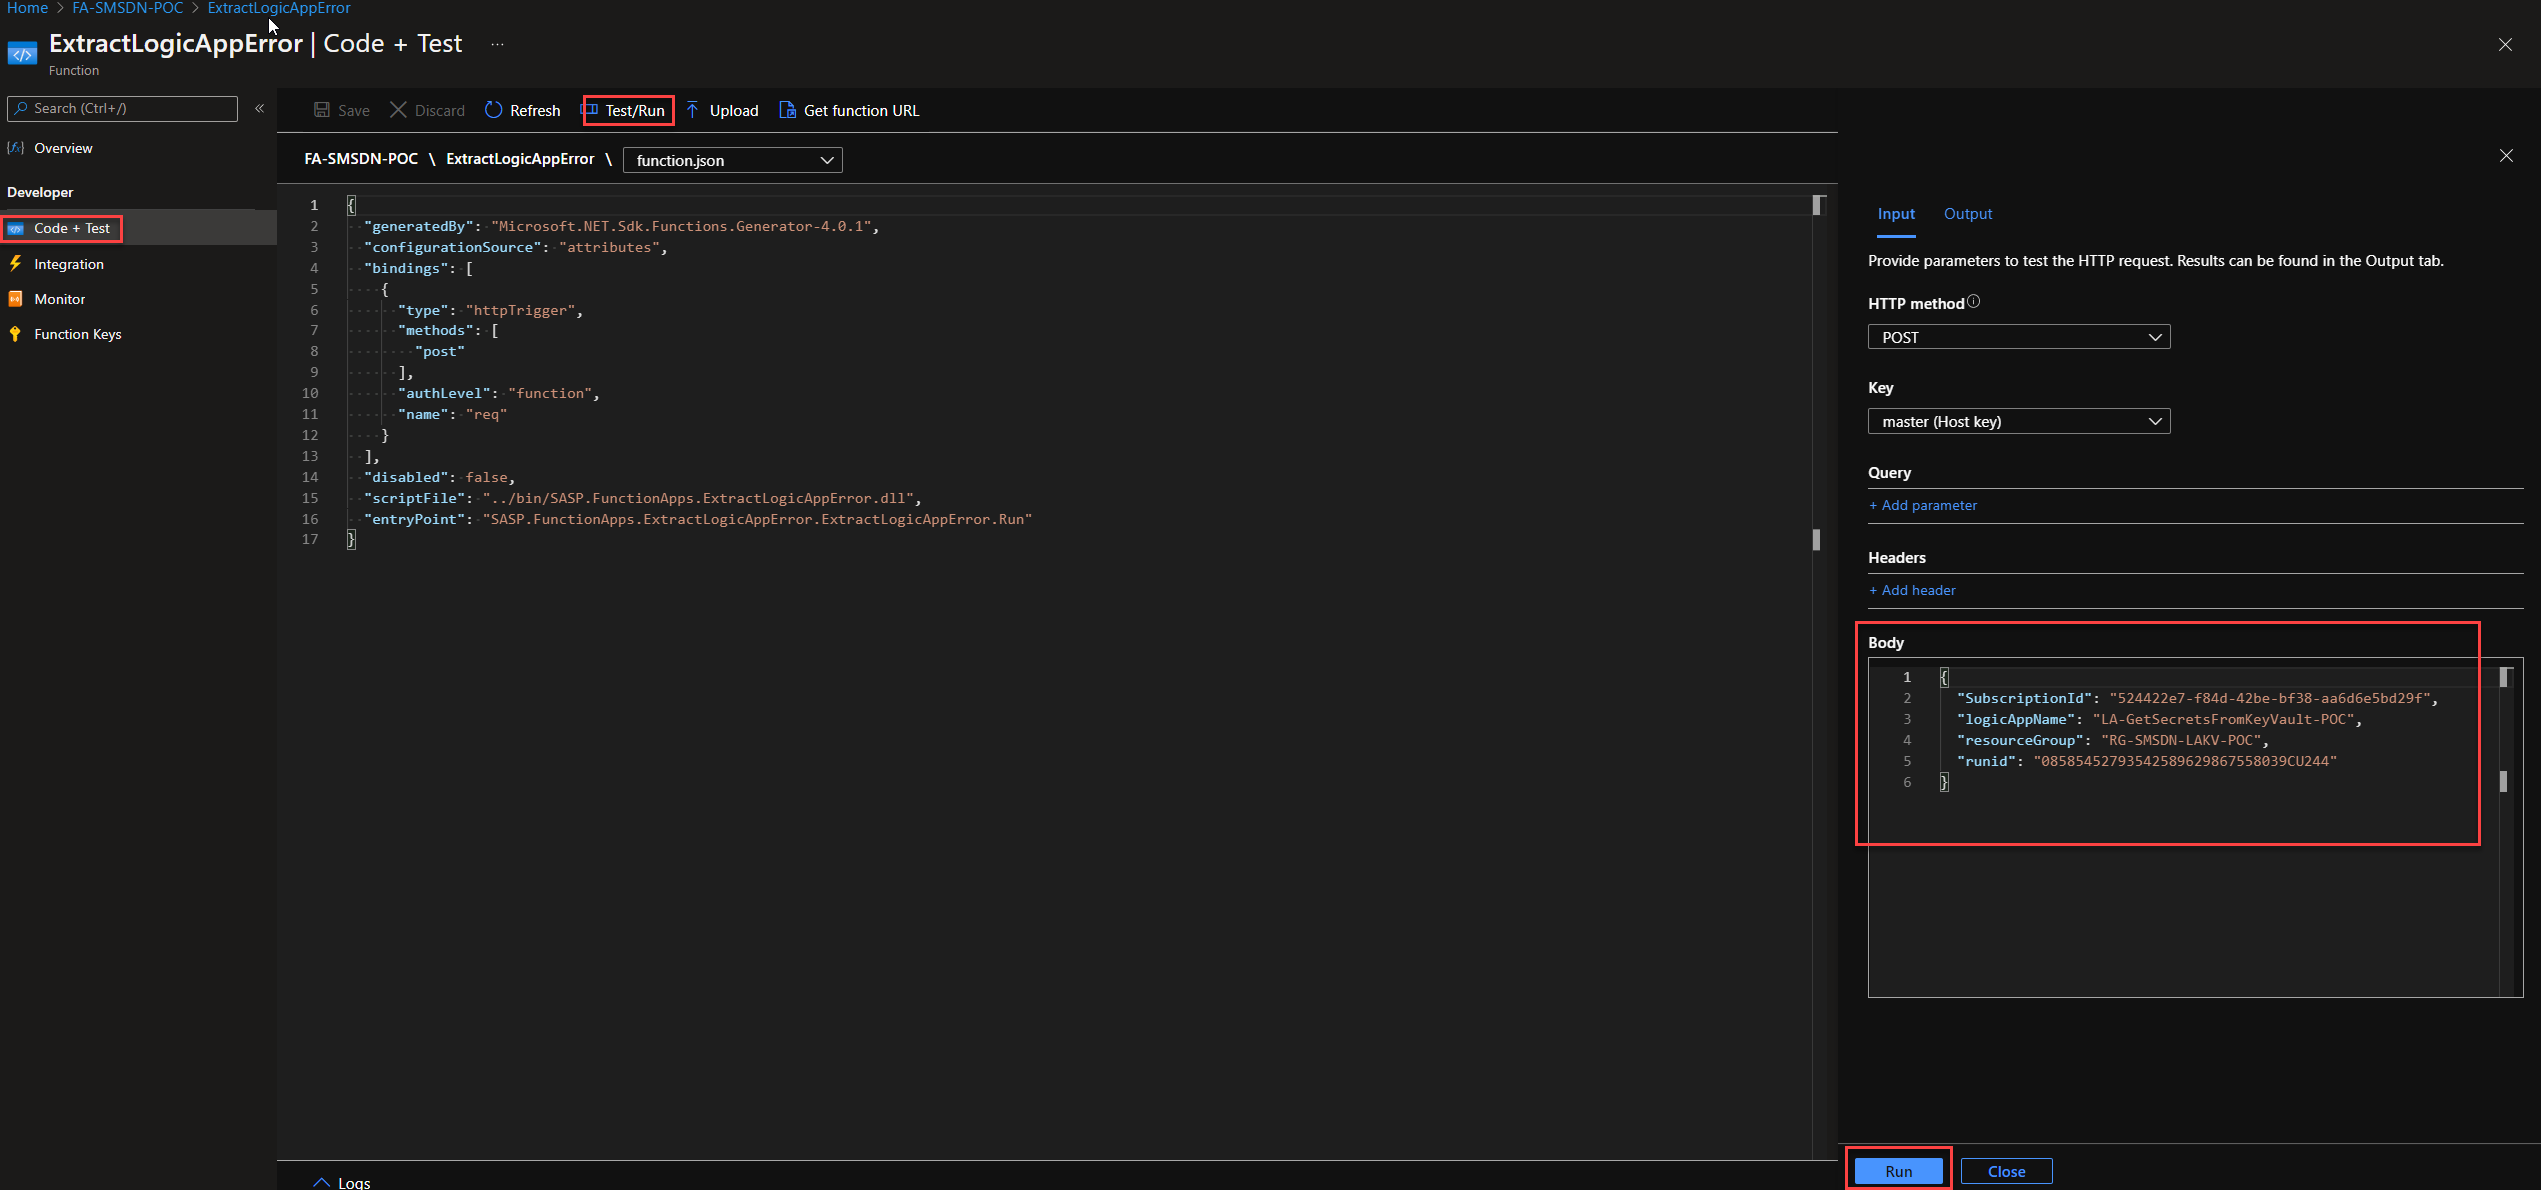
- On the Function page, select Code + Test from the left context menu, and then from the top menu select the option Test/Run
- Provide a test message on the body and other configurations required like headers and click Run.
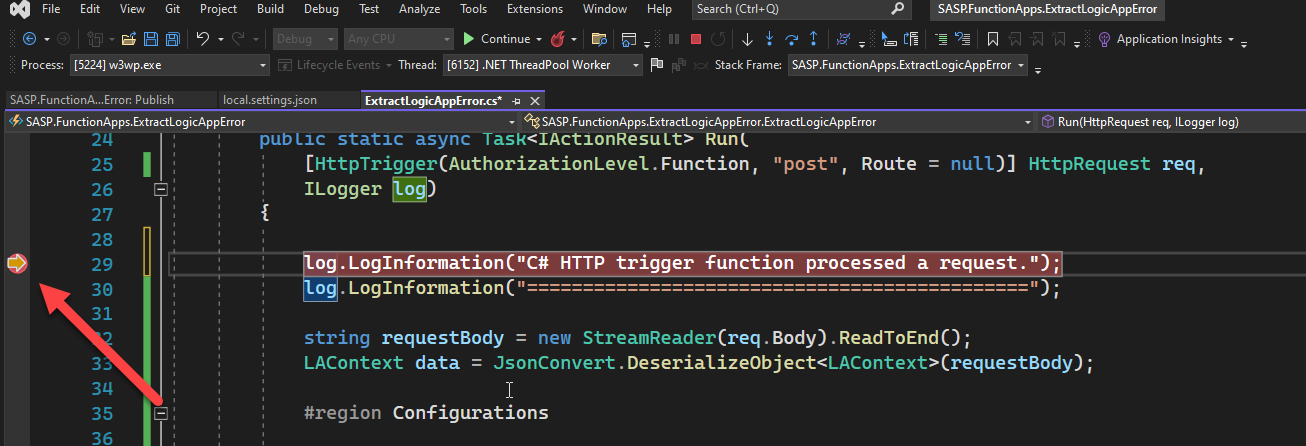
If everything goes well, your breakpoint will be hit!
Enjoy it!


