Welcome to the fifth and last part of this series of blog posts on How to throw custom exceptions inside Logic Apps.
In all those posts, we talk about the following:
- Part I – Using default capabilities
- Part II – Using default capabilities – Extract failure information
- Part III – Using default capabilities – Avoiding too many condition actions
- Part IV – Using a child Logic App to throw a custom exception
- Part V (this article) – Using an API Management Throw Exception API
The last approach we want to address in this series is another out-of-the-box idea: using an API exposed in API Management to throw back the exception.
This approach is similar to the previous one. Still, instead of using a child Logic App to receive an error message and throw back a failure, we are going to replace that with an API exposed in Azure API Management.
Approach 5: Using an API Management Throw Exception API to throw a custom exception
On paper, it seems easy, we need to expose an API that mimics the Echo API, but instead of returning an HTTP Status 200, it needs to throw back an error, in other words, an HTTP Status 400 or 500. However, that is the tricky part. To accomplish that, we need to create an external component. In our case, we decide to create a simple Loopback Azure Function:
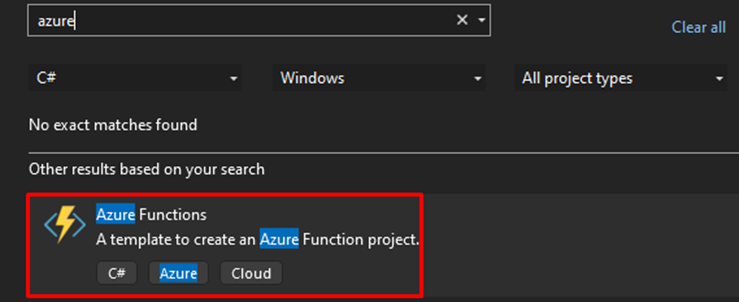
- Open Visual Studio and Create a New Project, in this case, an Azure Function:
- Next, define the location and the name of your Azure Function.
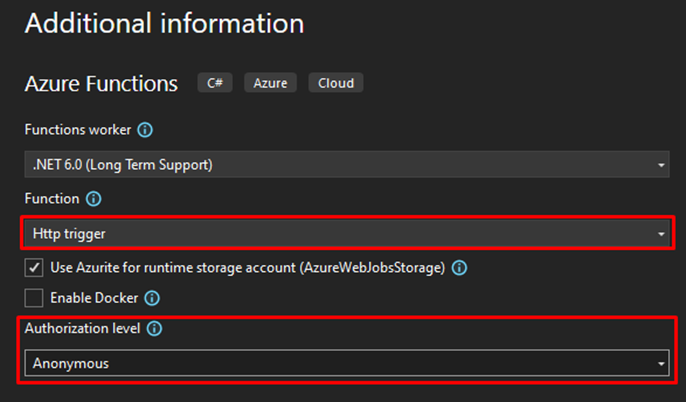
- Then choose the Function to be an HTTP trigger and the Authorization level; for this tutorial, we are going with Anonymous, meaning that anyone can have access to the Azure Function we are creating.
- This is the Azure Function that you need to create:
using System;
using System.IO;
using System.Threading.Tasks;
using Microsoft.AspNetCore.Mvc;
using Microsoft.Azure.WebJobs;
using Microsoft.Azure.WebJobs.Extensions.Http;
using Microsoft.AspNetCore.Http;
using Microsoft.Extensions.Logging;
using Newtonsoft.Json;

namespace SASP.FunctionApps.LoopbackAPI
{
    public static class Loopback
    {
        [FunctionName("Loopback")]
        public static async Task<IActionResult> Run([HttpTrigger(AuthorizationLevel.Function, "post", Route = null)] HttpRequest req, ILogger log)
        {
            log.LogInformation("C# HTTP trigger function processed a request.");
            string requestBody = await new StreamReader(req.Body).ReadToEndAsync();
            string contentType = req.Headers["Content-Type"];

            return new ContentResult { Content = requestBody, ContentType = req.Headers["Content-Type"] };
        }
    }
}
After we created it, we need then to publish it.
You can find the source code of this function here: Azure Function: Loopback API.
Now that we have our Azure Function, we need to create an API on our API Management:
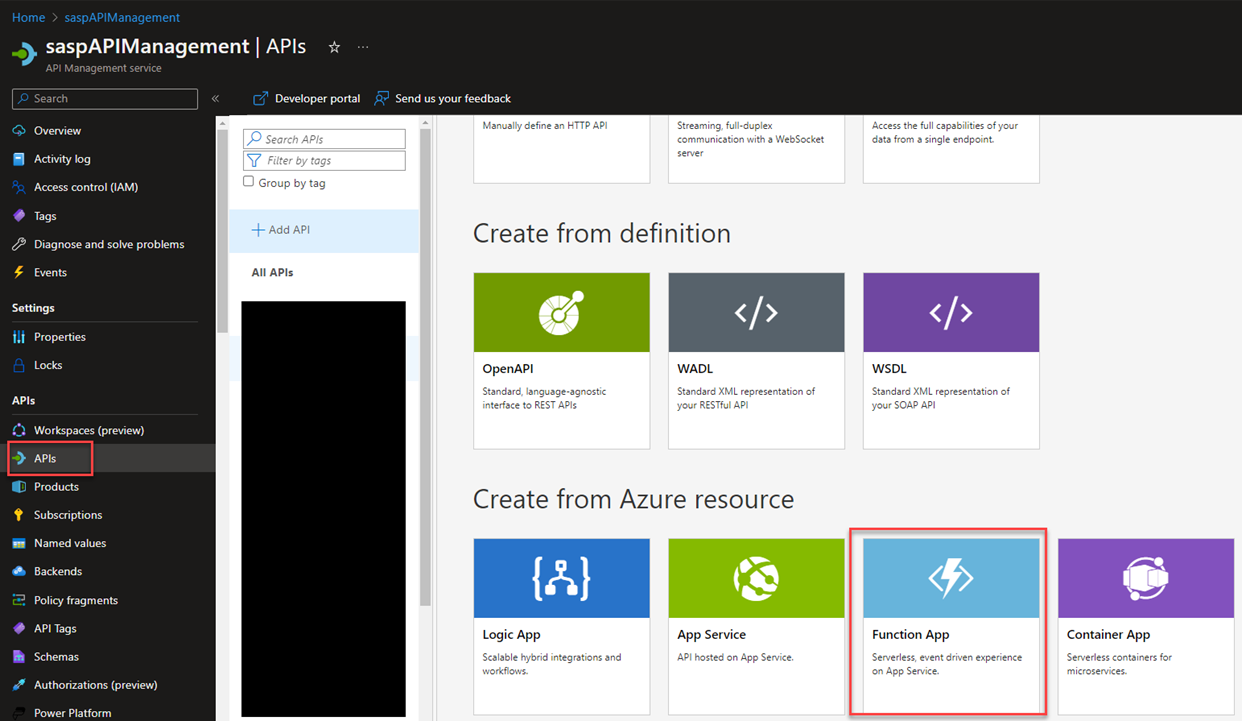
- Access your API Management portal and then select the APIs option under the APIs section.
- Click + Add API, and from the Create from Azure resource section, select the option Function App.
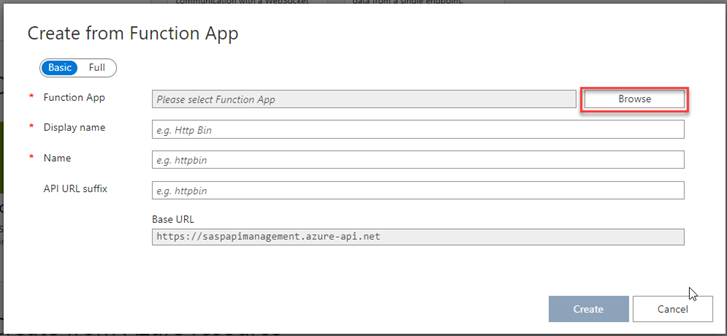
- On the Create from Function App page, on the Function App, click Browse.
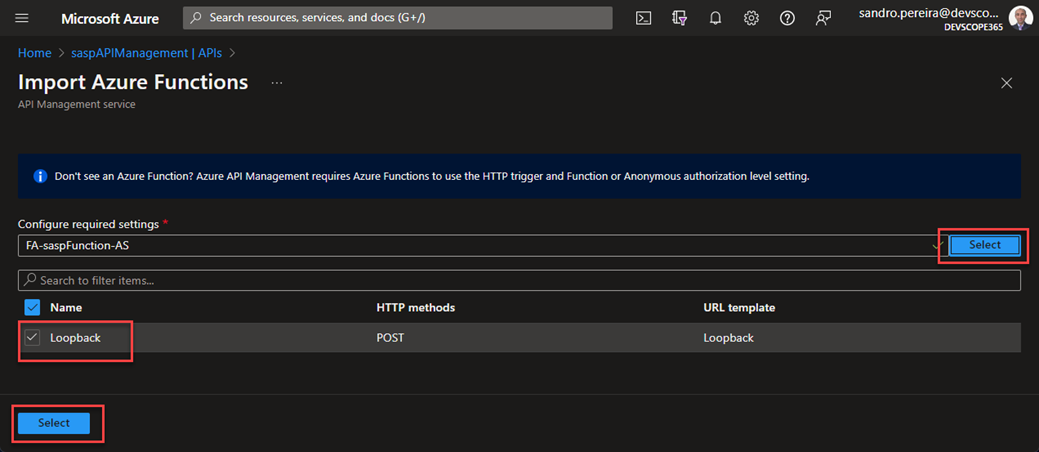
- On the Import Azure Functions page on the Configure required settings, click Select and choose the Azure Function from the list in order to present the functions available. Then select the available function and click Select at the end.
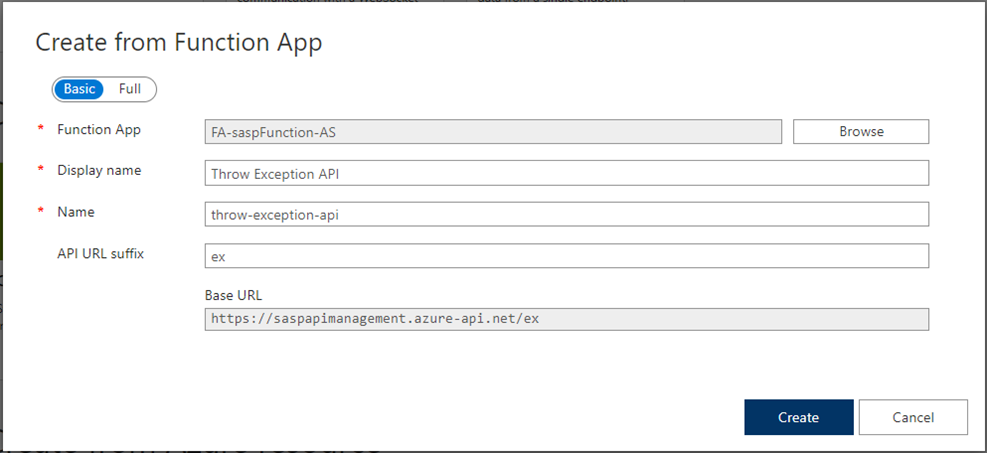
- Back to the Create from Function App page, set the following configuration:
- On the Display name property, set Throw Exception API.
- On the Name property, leave the default throw-exception-api.
- On the API URL suffix property, set ex.
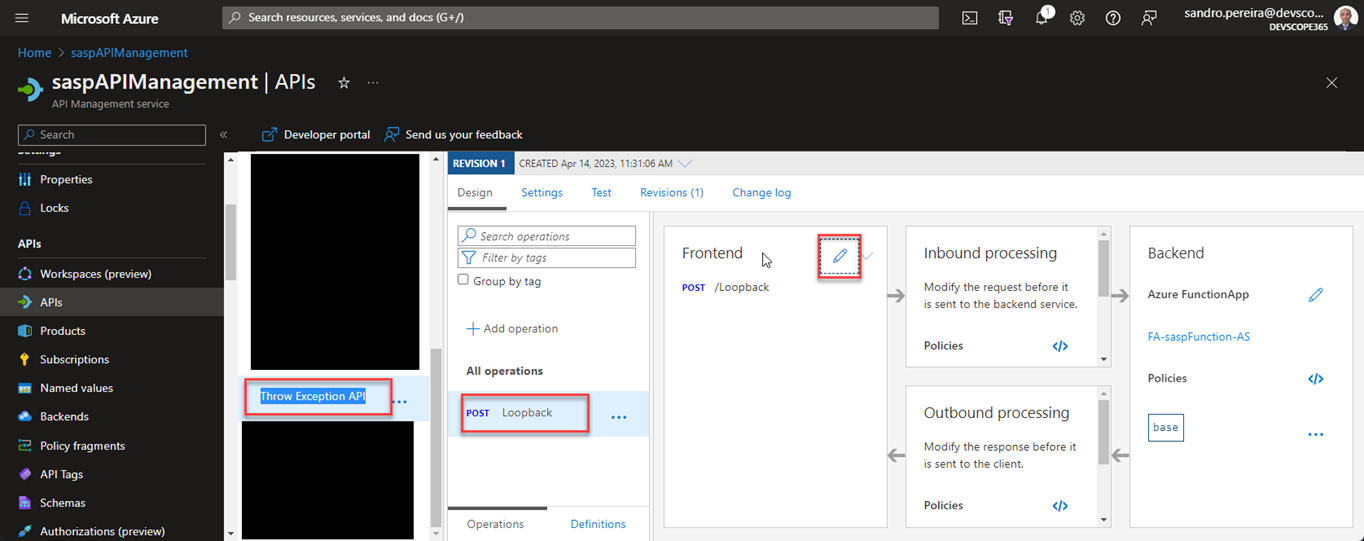
- Now from the API list, select the API we just created: Throw Exception API.
- On the operations list, select the Loopback operation, and on the Frontend, click Edit.
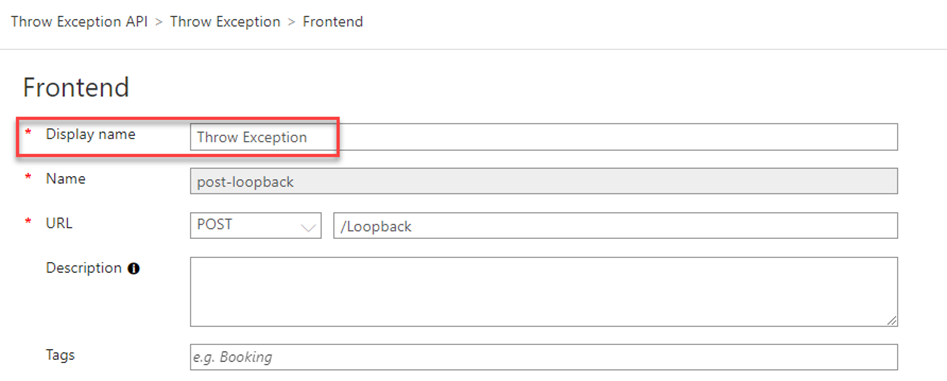
- On the Frontend page, let’s change some of the configurations to make it prettier.
- Change the Display name property to: Throw Exception
- Click Save.
- Now we need to create a policy to set an error code on the outbound policy. For that, select our operation, and in the Inbound processing or Outbound processing Policies, click edit.
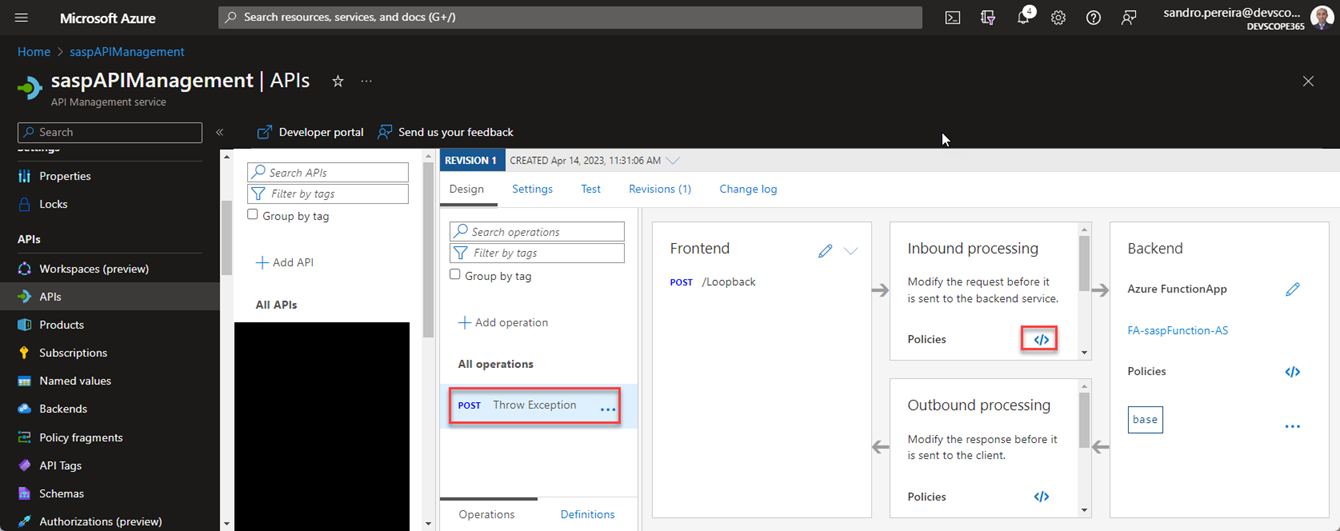
- Then add the following policy in the outbound section
<policies>
…
    <outbound>
        <set-status code="500" reason="Internal Server Error" />
        <base />
    </outbound>
…
</policies>
- Click Save.
Now, to have this operation appropriately rendered inside our Logic App, we need to create a definition. To do that, we need to:
- Select back again our Throw Exception operation and click the pencil icon in the Frontend panel.
- On the Frontend page, click on the Headers option and click + Add header and add the following header:
- In the Name property, set to Content-Type.
- In the Value property, set to text/plain.
- Select the option Required.
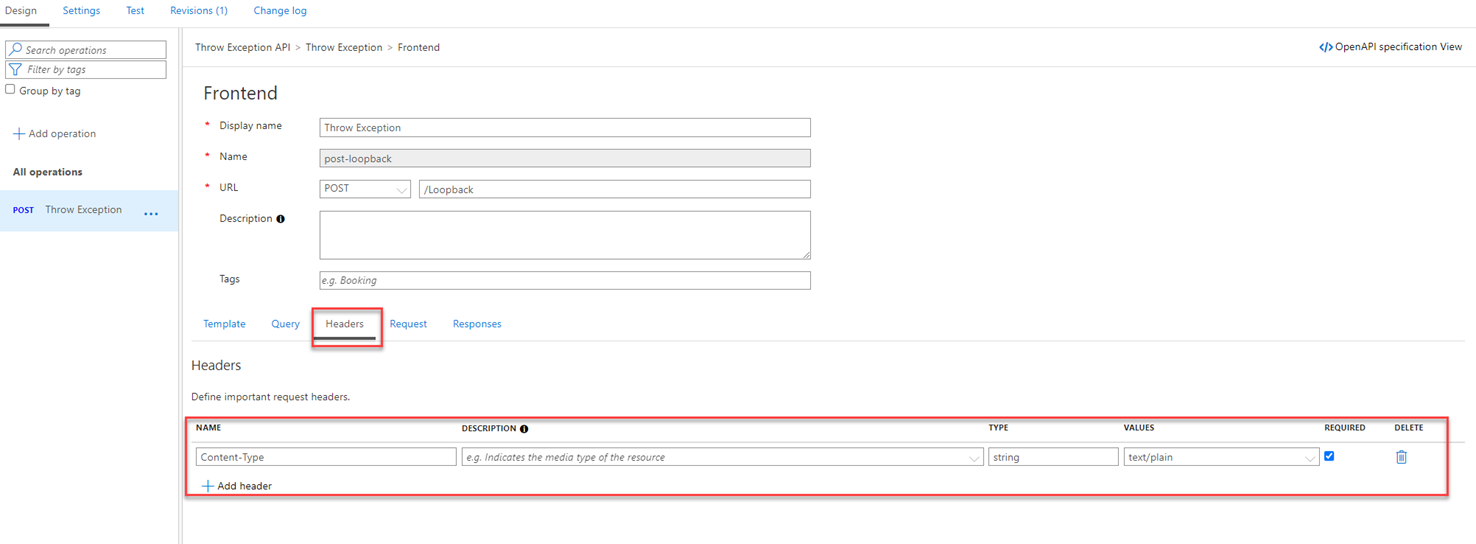
- Now, click on the Request option and click + Add representation and add the following representation in the Create a new definition page:
- On the Definition name property set as ThrowExceptionDef.
- On the Sample (JSON) property, set the following payload:
- “Invalid Age! You need to be older than 18.”
- Then click Create Definition.
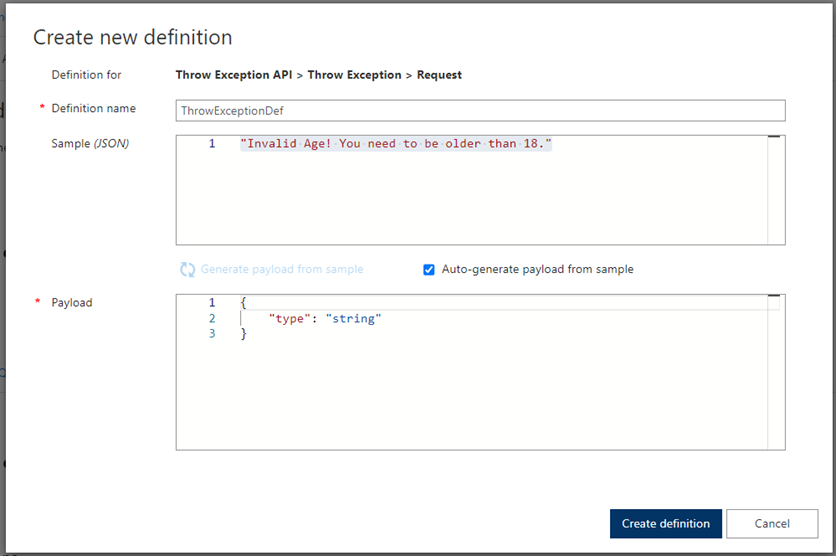
- Click Save.
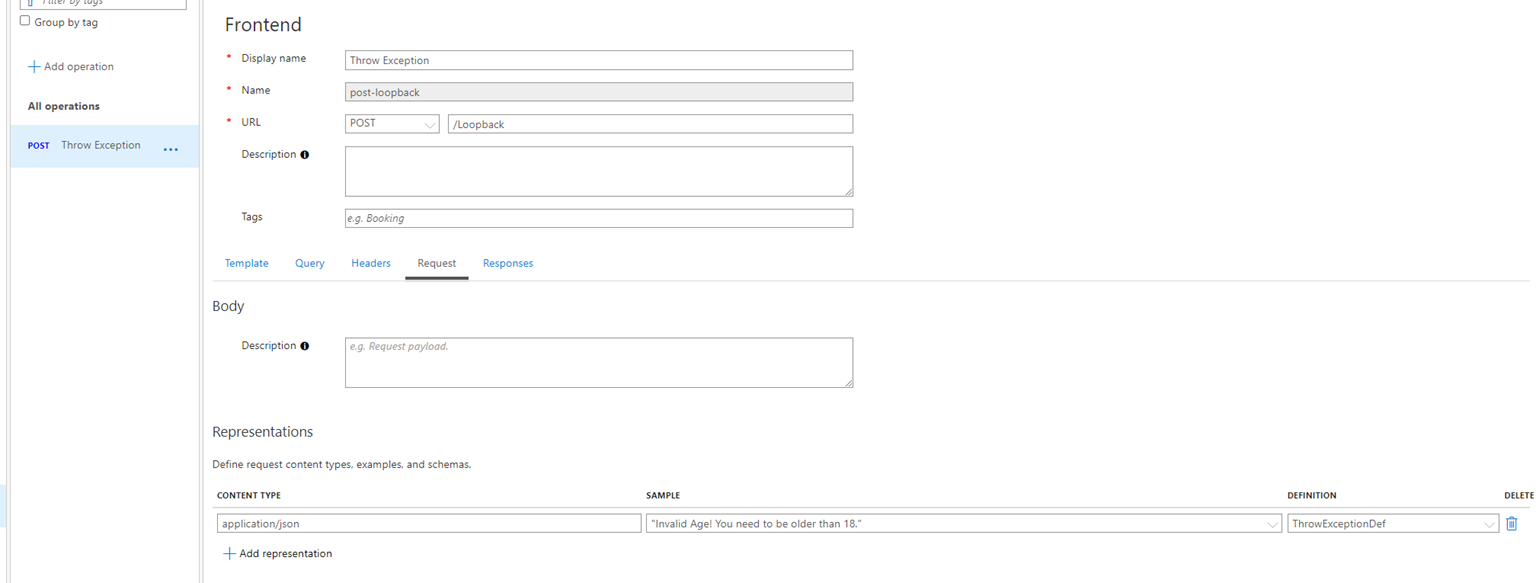
Now that our API is exposed, it is time to modify our Logic App.
In this fifth approach, we are going to make some small changes to the previous approach, replacing the call chield Logic App with a call to the API Management:
- Expand the Try Scope, expand the Check if name is John condition, and on the False branch:
- Delete the call to the child Logic App action inside.
- Then, click Add an action. In the search box, enter API Management, and from the result panel, select the Azure API Management connector, and from the list of APIM, select the APIM where we exposed the earlier created API. Finally, select the throw-exception-api.
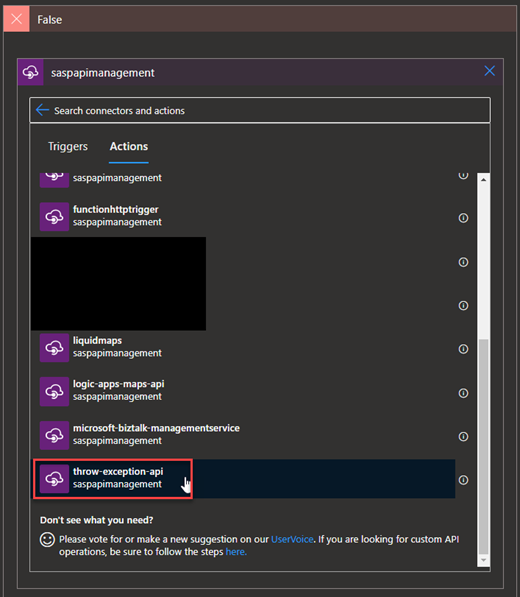
- Then, of course, the Throw Exception operation.

- On the Throw Exception action, perform the following configuration:
- On the Content-Type property, leave the default value text/plain.
- On the throwExceptionDef property, set the following expression:
- @{triggerBody()?[‘name’]} is an Invalid Name!
- On the Subscription Key property, define your subscription.
- Note: there are ways to authenticate to APIM. Adjust your options according to your needs.
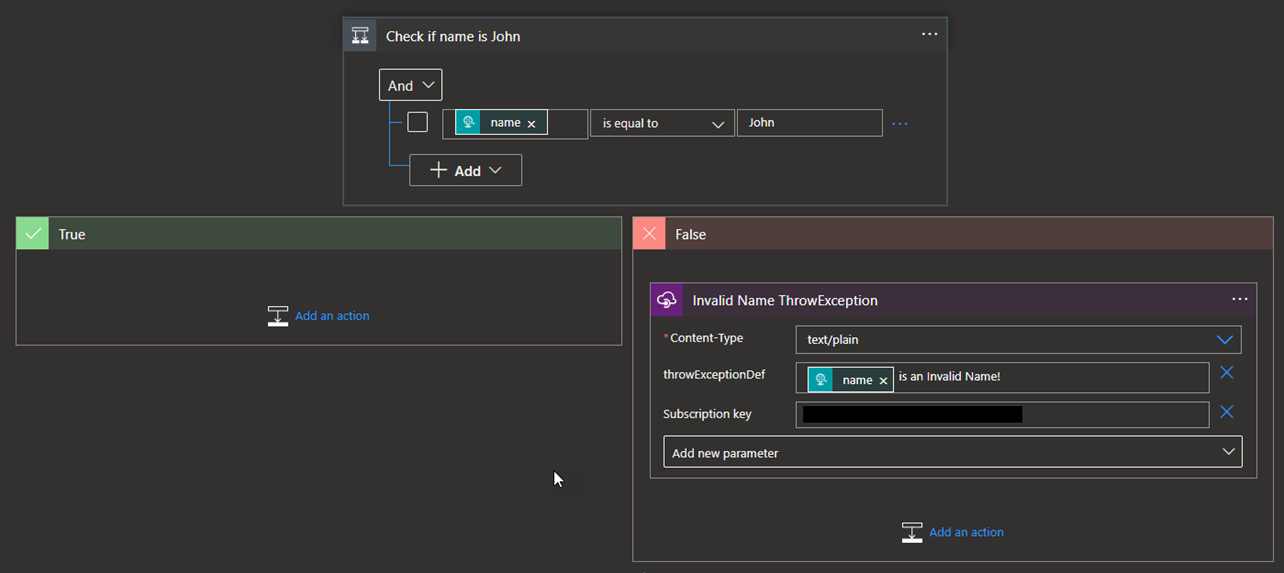
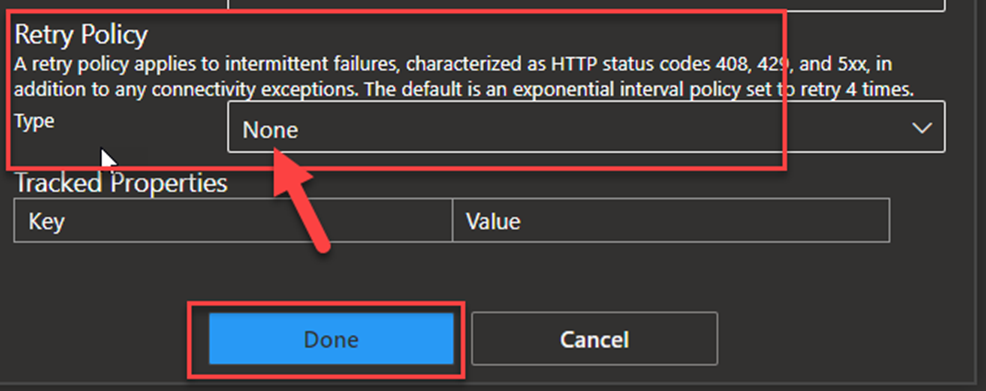
- In the Invalid Name ThrowException action, click on … (3 dots) and then select the Settings option.
- On the Settings for ‘Invalid Name ThrowException’ panel, set the Retry Policy property to None and click Done.
- Now let’s expand the Check if Age is Less than 18 condition and on the False branch:
- Delete the call to the child Logic App action inside.
- Then, click Add an action. In the search box, enter API Management, and from the result panel, select the Azure API Management connector, and from the list of APIM, select the APIM where we exposed the previous API. Finally, select the throw-exception-api.

- Then, choose the Throw Exception operation.

- On the Throw Exception action, perform the following configuration:
- On the Content-Type property, leave the default value text/plain.
- On the throwExceptionDef property, set the following expression:
- Invalid Age! You need to be older than 18.
- On the Subscription Key property, define your subscription.
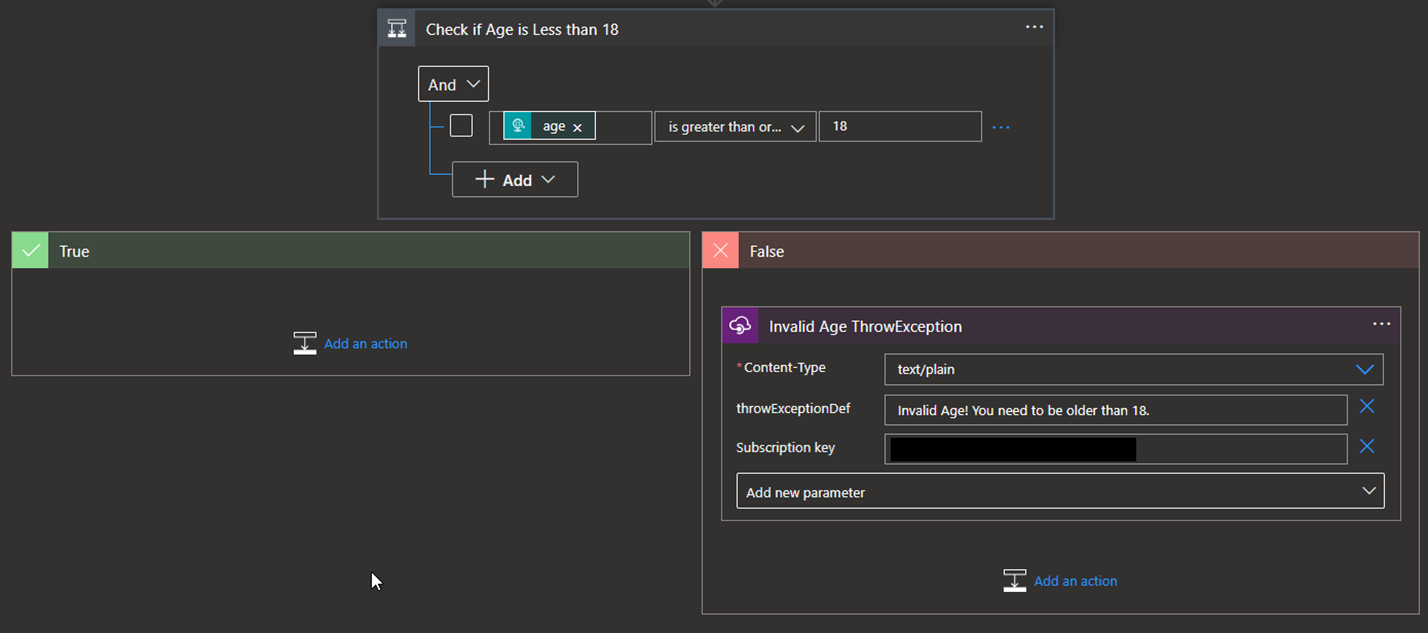
- In the Invalid Name ThrowException action, click on … (3 dots) and then select the Settings option.
- On the Settings for ‘Invalid Name ThrowException’ panel, set the Retry Policy property to None and click Done.

- Save the Logic App.
If we try our solution again, we will get our custom error description.
{
    "Result": "Invalid Age! You need to be older than 18."
}
I hope you enjoyed this series of blog posts.


