In the first part of this article, we mention that at the moment, you have three options for you to start developing your Logic Apps:
- You can start creating your Azure Logic Apps by using the Azure Portal – probably the most used form;
- You can begin creating your Azure Logic Apps by using the Visual Studio – probably the favorite tool amongst developers;
- Or you can start building your Azure Logic Apps by using the Visual Studio Code – with is getting more fans every day;
And we analyze the advantages, disadvantages, and how to start developing Logic Apps by using the Azure Portal. Today we are going to address. Today we are going to do the same but this time using Visual Studio 2019.
Using the Visual Studio to create your Logic Apps
This option is probably the favorite tool/approach amongst common developers to create there Logic App projects, and the main reasons for that are that:
- It is the favorite developer tool;
- You will not need to change to different tools to program in other languages/technologies.
And the good news is that the Logic Apps Designer is available for:
It is supported for Community edition or greater.
Of course, in this blog post, we will be addressing Visual Studio 2019 only.
Prerequisites
- Visual Studio 2019, 2017, or 2015 – Community edition or greater;
- Visual Studio Tools for Azure: Azure SDK, tools, and projects for developing cloud apps and creating resources using .NET Core and .NET. Important also to create hybrid solutions without having the need for another development environment.
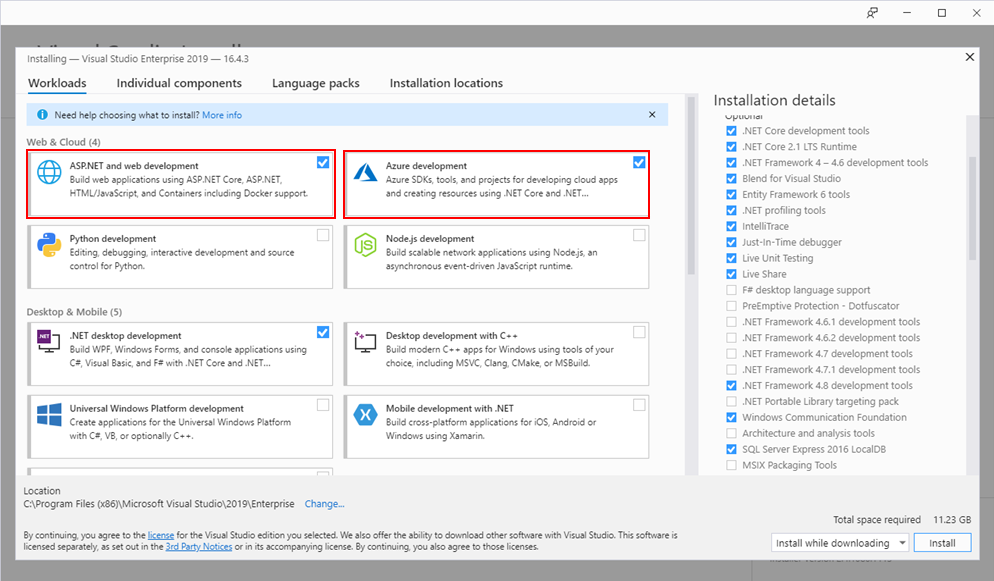
- In the Visual Studio installer, install Visual Studio (or modify an existing installation). Make sure the Azure development and ASP.NET and web development workloads are selected.
- Microsoft Azure PowerShell:
- How to install Azure PowerShell
- Microsoft Azure PowerShell
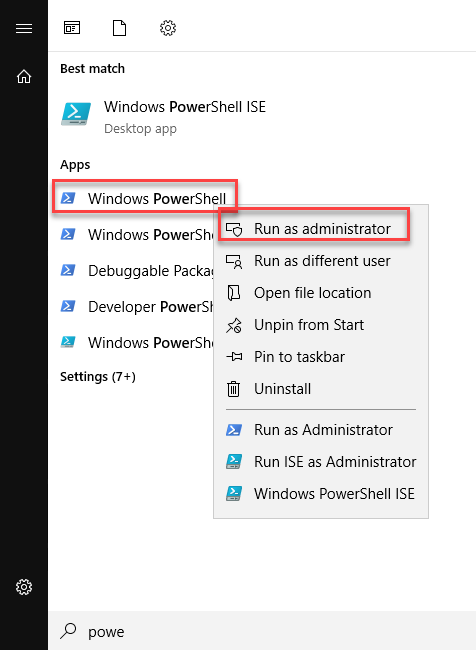
- Run Windows PowerShell as administrator
-
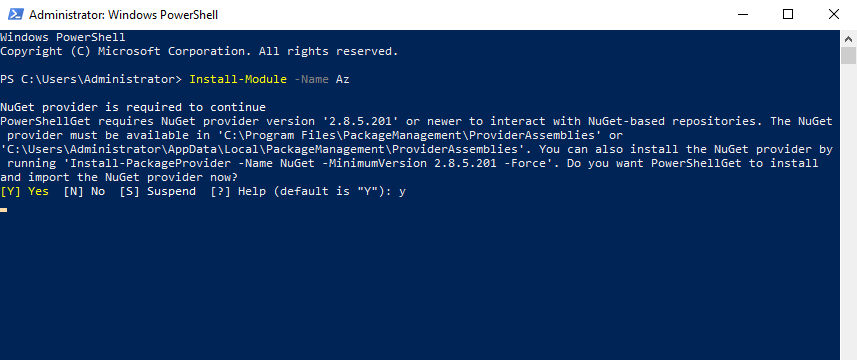
- And run the following command: Install-Module -Name Az
Note: of course, for this or any other approach describe above, you need an Azure subscription or sign up for a free Azure account.
Install Azure Logic Apps Tools for Visual Studio 2019
To accomplish that we need to:
- Open your Visual Studio, on the entry screen select the option Continue without code ->
- Then on the menu, navigate to Extensions > Manage Extensions

- Select Online and search for Logic Apps
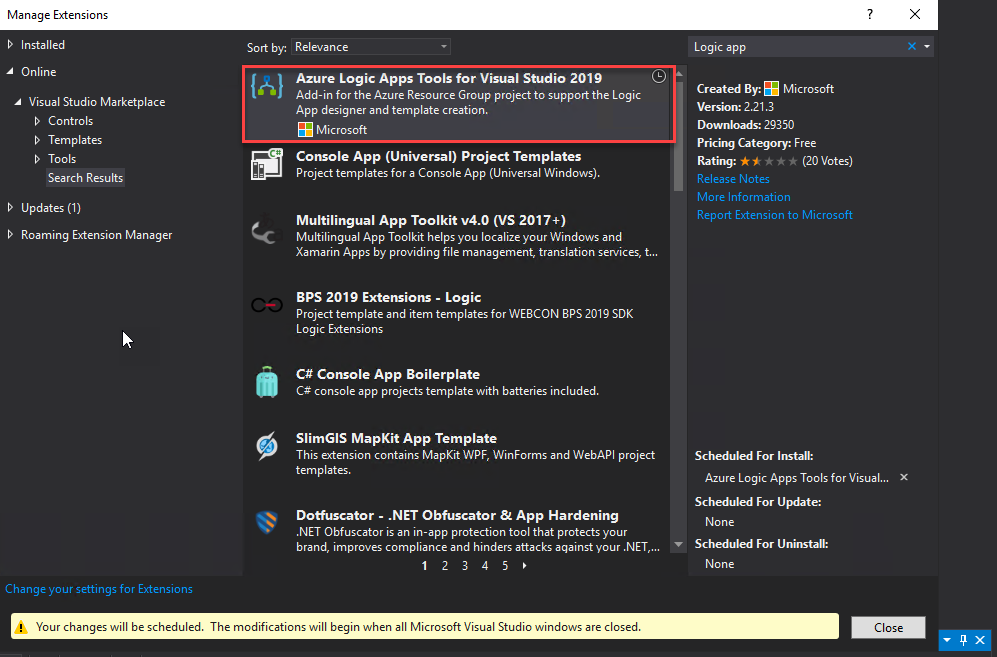
- The add-in will be listed in the search results section. Click Download to download and install the add-in. You need to close your Visual Studio in order to begin installing this extension.
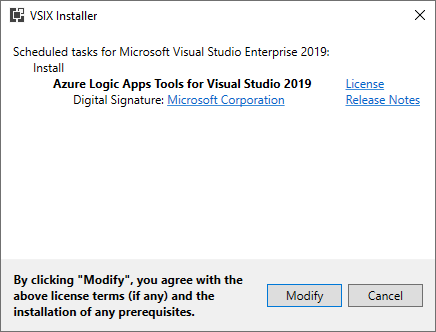
- On the VSIX Installer screen
- Make sure that the correct version of Visual Studio is selected.
- Click Install or Modify. This will download and install the add-in to your version of Visual Studio.
-
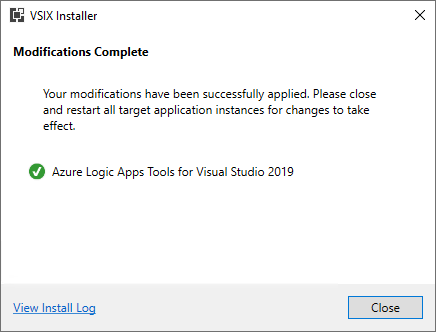
- At the end select Close.
How can I get started?
The Logic Apps designer integrates with the current Azure Resource Group project so you can seamlessly work with resource deployments that include Logic Apps. Saying that to get started, create an Azure Resource Group project:
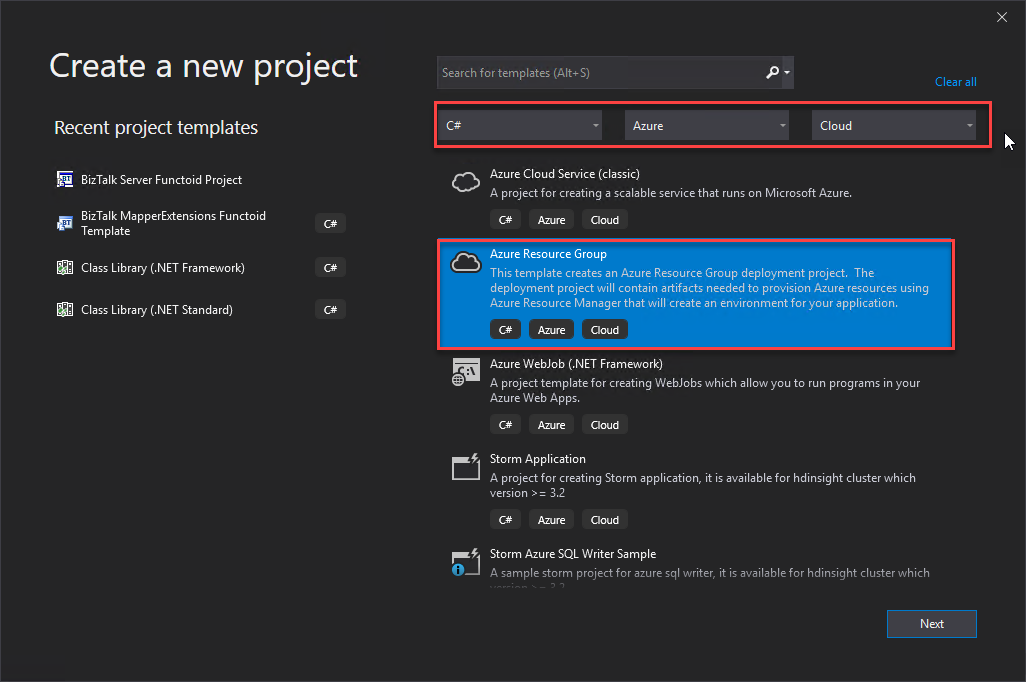
- Open Visual Studio and on the Create a new project panel, select C# -> Azure -> Cloud, or select for Azure Resource Group;
- Select Azure Resource Group from the template list;
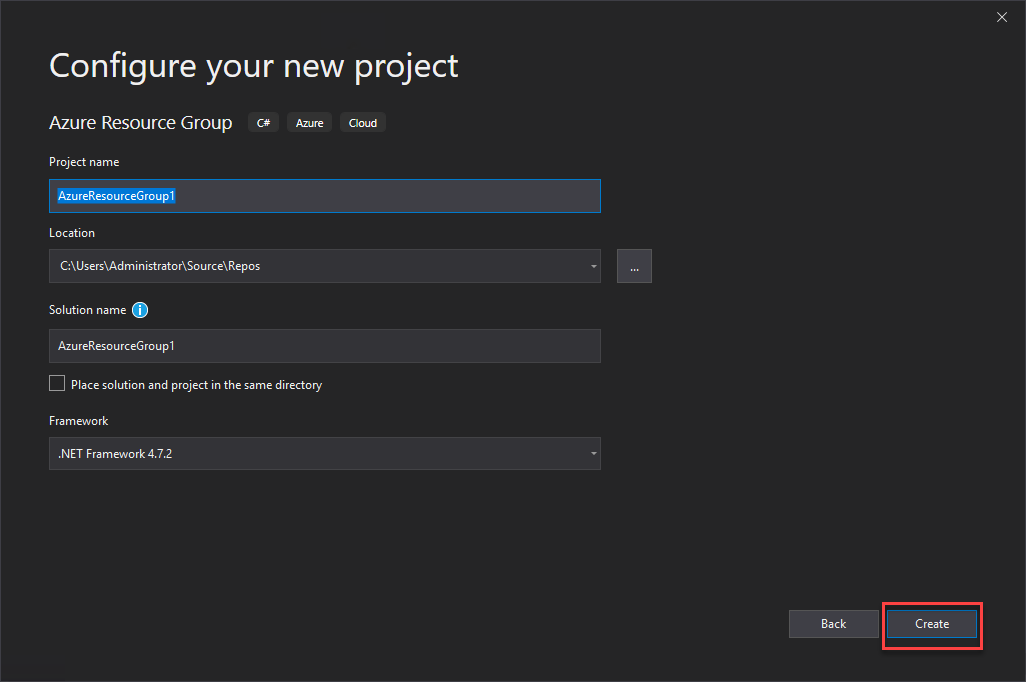
- On the Configure your new project panel, give a proper Project name, Location, Solution name, and leave the Framework as .Net Framework 4.7.2 and select Create.
- Finally, on the Select Azure Template panel, from the Visual Studio Templates list, select the Logic App template and select OK.
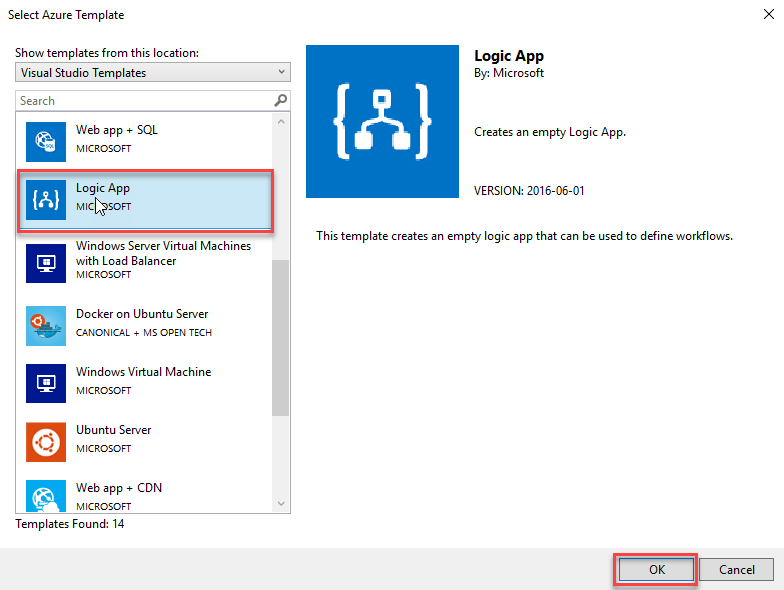
This will create an empty Visual Studio Logic App solution. Now on the Visual Studio solution:
- Right-click on the LogicApp.json file and select Open With Logic App Designer
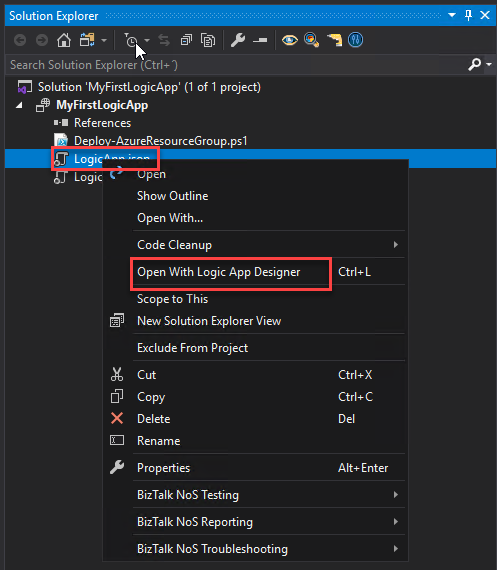
- This will open a Logic App Properties window, where you need to:
- Define the credentials to authenticate on the Azure subscription;
- Define the Subscription and Resource Group where you want to create these resources;
- Define if you want the Location to be in the same Region or in an Integration Service Environment (ISE);
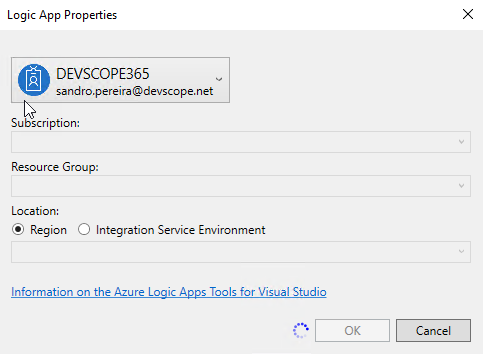
- And then select OK.
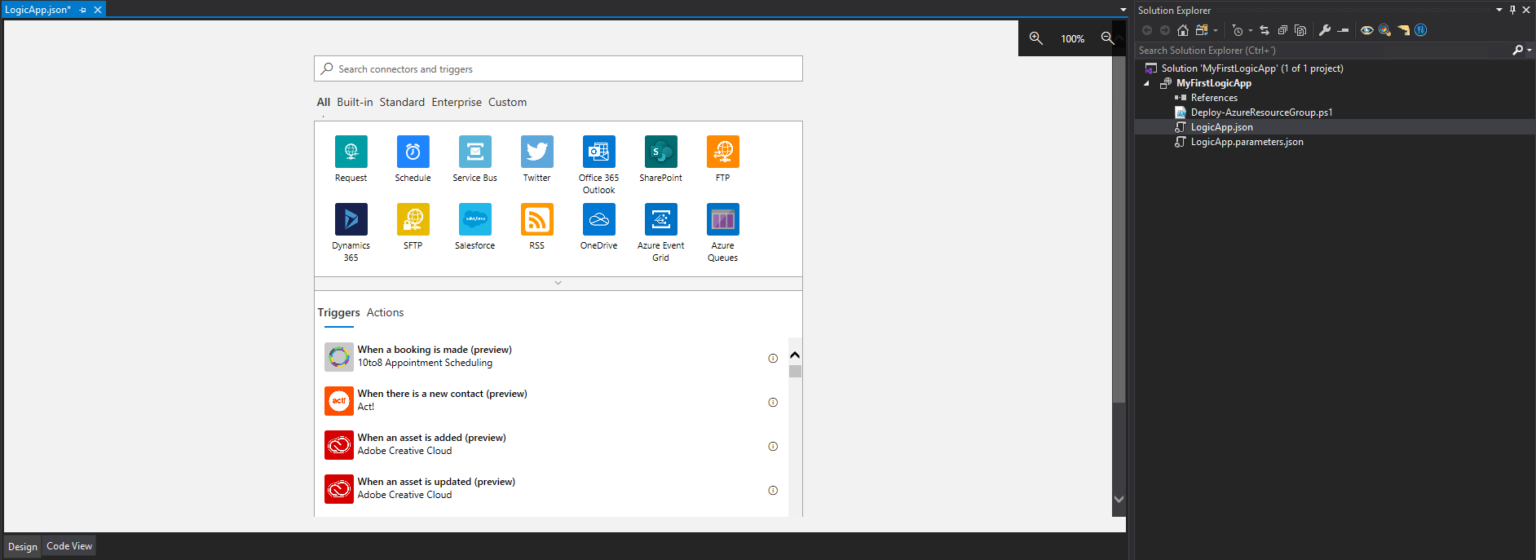
This will embed the Logic App designer inside the Visual Studio.
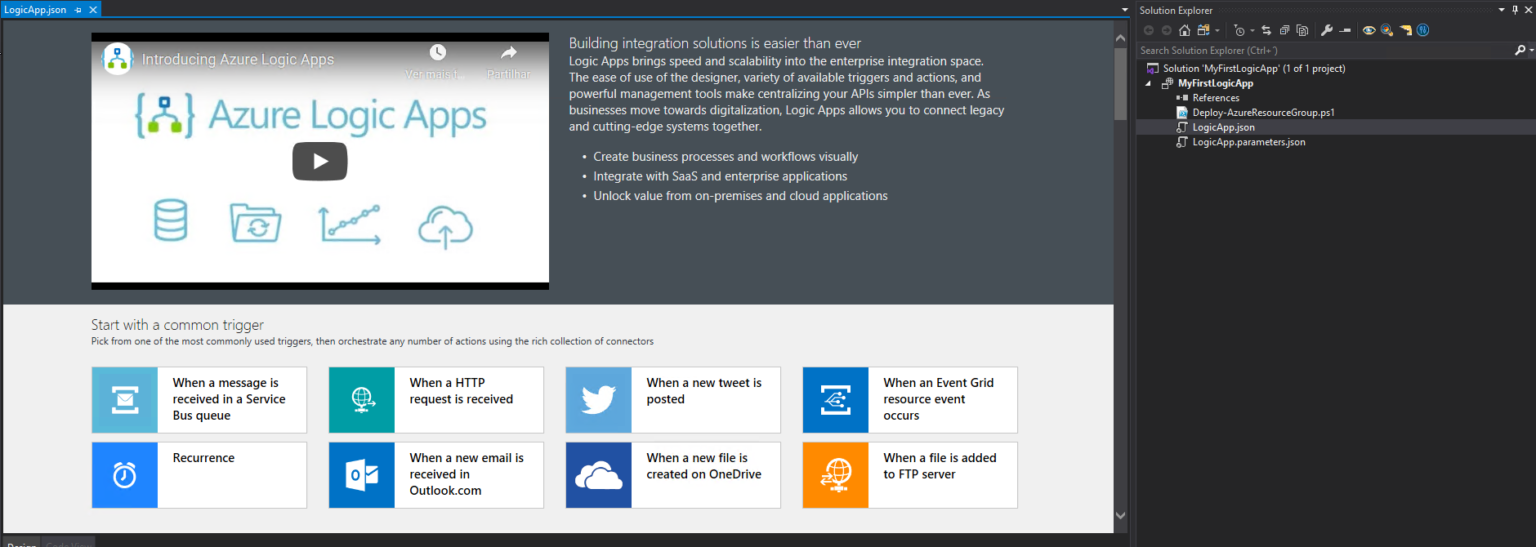
Now you need to select a common trigger, a template, or use a blank Logic App to start creating your business process.
Advantages of using Visual Studio
This almost seems the inverse of the Azure Portal. We may say that the advantages of this approach are:
- Full CI/CD (Continuous Integration/Continuous Delivery) support which also means that:
- We are able to easily customize almost everything and we can easily use an Azure Pipelines in Azure DevOps to easily deploy across environments or different resources;
- We can easily customize/parameterize our Logic App template, parameters, and variables;
- We can easily change the default connector names to have a proper naming convention;
- All the connection settings will be automatically rectified in an upsert matter (create the resource if it doesn’t exist or update if already exist);
- We are able to easily customize almost everything and we can easily use an Azure Pipelines in Azure DevOps to easily deploy across environments or different resources;
- Allow source code repository and along with DevOps, we can have a fine-tuning auditing system to track who made the changes and new deployments.
- We have two types of versioning in this approach, Visual Studio versioning and the full development life cycle inside TFS or Git. Still, we have the default versioning feature available in the Azure Portal.
- A well know tool for developers;
Of course, we can always deploy directly from Visual Studio, but that means manual process and extra work to modify all those configurations between environments.
Disadvantages of using Visual Studio
But this approach also comes with some drawbacks, being the most critical ones:
- This approach requires a Visual Studio License, and not all users and clients have them.
- There are some well-known bugs, being the most critical the memory leaks inside Visual Studio when trying to work with large Logic Apps – Logic Apps that have a fair amount of actions. This bug makes it impossible to make any changes inside Visual Studio, and we are still waiting for the product group to provide a hotfix. In these circumstances, we need:
-
- To implement all the changes manually on the code view or apply that changes/modifications using the Azure Portal;
- Or divide the process into multiple small Logic Apps;
-
But we can also say that the following reason:
- The start-up will be more difficult or costly, with more extensive configurations to be able to start developing;
- Is a tool focused on developers users e sometimes to powerful or extensive for the actual requirements;
are also some possible disadvantages to this approach.
When is recommended to use Visual Studio for developing my Logic Apps?
In my opinion, always or at least always when we are working in multiple environments, in order words, we need to deploy the resources to different environments – different subscriptions or resources. Especially if you are a developer!. I may bypass this approach, and use only the Azure Portal, or do a combination of Visual Studio and Azure Portal in the following circumstances:
- When I need to create a simple process that will be only used in a unique resource (or environment);
- I may use Azure Portal to make the skeleton and much of the initial work, because is faster and has fewer bugs, and then finalize the work using Visual Studio;
- Or I will once again use the user Portal or code view inside Visual Studio if I’m working with huge Logic Apps – Logic Apps that have a fair amount of actions – to overtake that well-known limitation depending on the changes I need to do.
Stay tuned for the next developer approach: Create your Azure Logic Apps by using the Visual Studio Code!


