Welcome again to another BizTalk Server to Azure Integration Services blog post. In my previous blog post, I discussed how to send zipped messages or files. Today, we will discuss the same topic but in the opposite direction, which is also a classic requirement in legacy BizTalk Server solutions: How do you receive zipped messages (files)?
Previously, we have spoken about how to Zip Files to be sent inside Logic Apps, and for that, the best case was using an Azure Function to do the hard work of zipping the content. But today, we want to explore how to unzip files we may receive and process them individually.
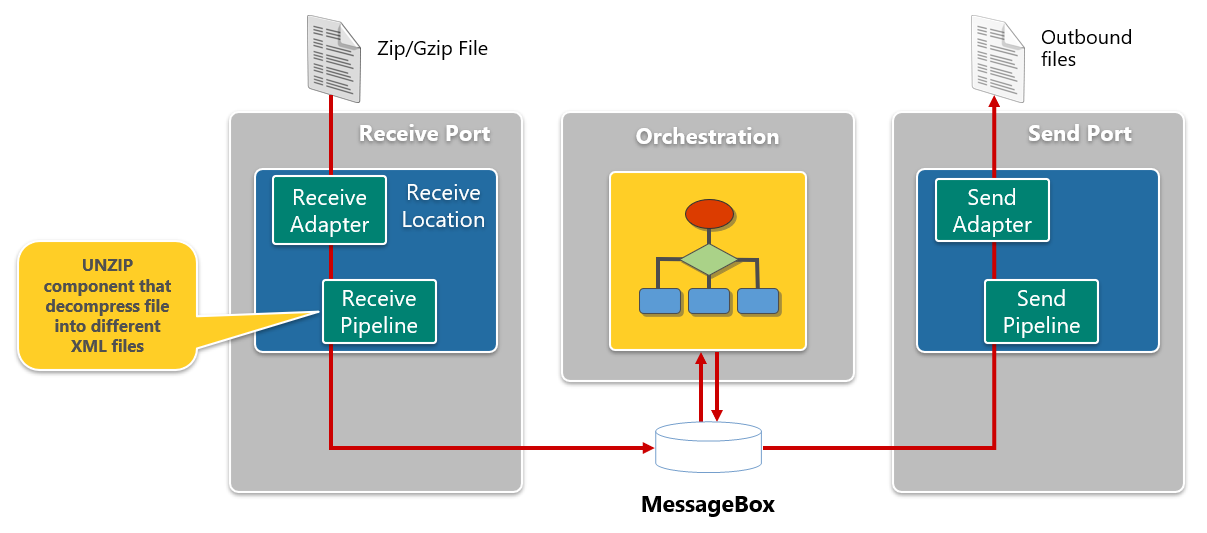
BizTalk Server solution: For receiving a zip message by File or (S)FTP
Of course, as always, there are multiple ways to accomplish this solution. But one of the most simple and elegant solutions to achieve this is by:
- Creating a custom pipeline component to unzip (or decompress) the message we want to receive and Disassembler them to be processed individually. A good sample is my Unzip Pipeline Component, which is available on my GitHub. You can find the source code here: Unzip Pipeline Component.
- This UnZip File Pipeline Component for BizTalk Server can be used in a Received pipeline (Disassemble stage). It allows you to receive a compressed (zip/gzip) file and extract its contents into different XML messages.
- The capabilities are similar to those available in compression software such as WinZip or 7-zip.
- This component doesn’t require any configurations.
- Create a custom receive pipeline with that Unzip pipeline component. The solution will be agnostic to the adapter used.
The challenge
You may be thinking, once again, that this type of solution is old-school, and no one sends zip files anymore! The allowed size to exchange files is growing in all services or systems. However, there are solutions built many years ago, and companies sometimes are reluctant to change something proven to work, as this will always incur additional costs. Also, for performance, a zipped file will be better to upload.
But again, the point here is not to discuss whether these types of integration are old-school or not or if you should improve them. The goal here is that you have a request to migrate these types of solutions from BizTalk Server into Azure Integration Services, maintaining the exact requirements. This is a straightforward integration that, at first glance, is quite simple to migrate; however, there is one big challenge: by default, there aren’t many components (expression or out-of-the-box connector) to Unzip a message (or file).
At first, this might sound: Well, another Azure Function is coming to the rescue!
But no, not this time. Today, we will unzip the files entirely inside the Azure Portal.
The best option to migrate these solutions using Azure Integration Services is to use and read files from a blob container. That means that:
- This integration will be straightforward if you read a zip file from a blob container.
- Otherwise, if you use a file connector, SFTP, or other type of connector, then the best approach will be:
- After reading the file, upload it to a blob container.
- Read and unzip the file using the Azure Blob Storage connector.
For this proof-of-concept, we decided to use the two options.
Building the Logic App solution
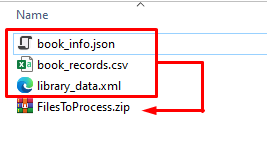
In this Proof-of-Concept (POC), first, we need files to zip! And since, in our daily tasks, we may work with a variety of files without our scope of control, let’s approach this with a set of 3 different files:
- .json
- .xml
- .csv
These are the files, to be exact, and we zipped them into a file named FilesToProcess.zip.
We are all set to start building the logic behind the unzipping process. Let’s say we receive the files in a blob container to make things easier to understand. Knowing this, we need to create one and to create a blob container, we need a storage account. So, let’s create a storage account first:
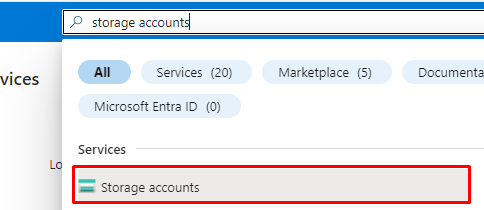
- In the Azure Portal, search for the storage account and click on it:
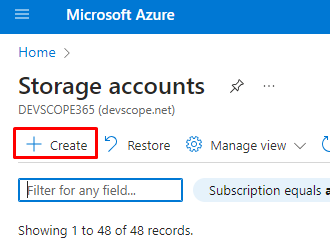
- Next, click on + Create.
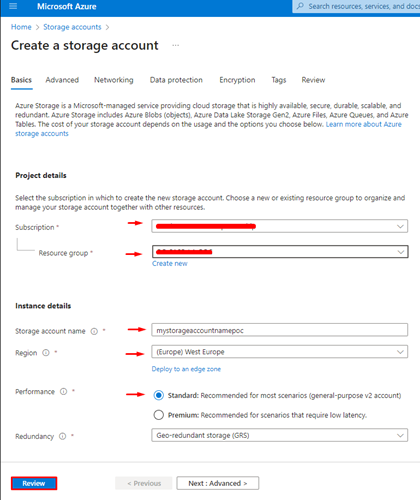
- Now you need to populate some fields like:
- Your subscription, resource group, give a name to the storage account, and select your region. As for the performance, choose the standard.
- Now, this is what your storage account should look like:
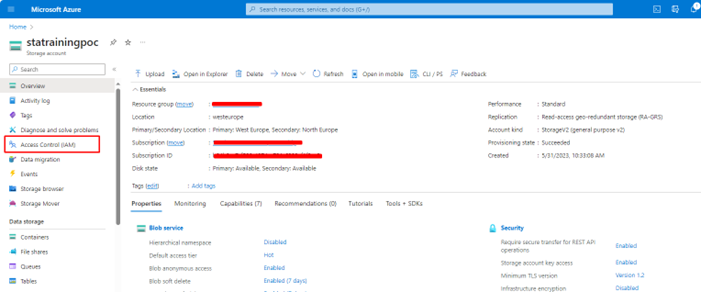
- As you can see in the lateral bar in the Data Storage we have the Containers, File Shares, Queues and Tables, but before we create a container, we will need to do one thing first. Give yourself privileges! And you might ask why. Well, because sometimes you will need them to be able to work with some features, click on Access Control (IAM).
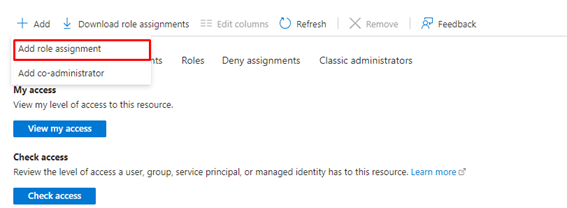
- Next, click on Add role assignment.
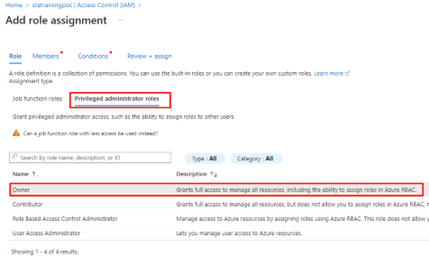
- Once clicked, choose the Privileged administrator roles and select Owner.
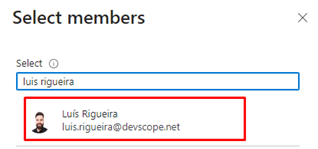
- Next, click on the Members tab and Select Members.
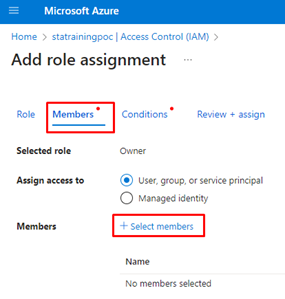
- And finally, a new window on your right side will open. You should find yourself inside your organization and click Select to confirm your role privilege.
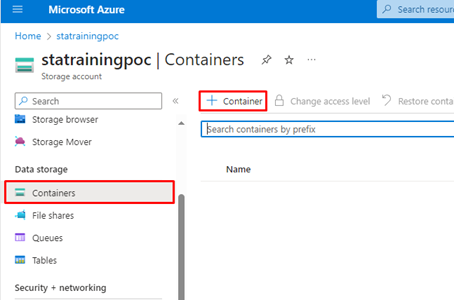
- Now, you are ready to create your containers!
- On the overview page, click the Containers tab and then Container to add a container.
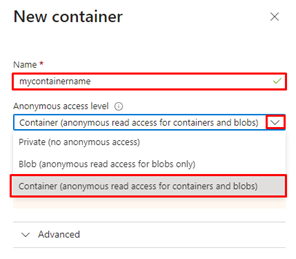
- Next, a new window will open, and you should choose your container name. On the drop-down menu of the anonymous access level, choose Container (anonymous read access for containers and blobs).
- Nex click on Create.
- In our case, we added two containers (as you should) and named them:
- zipfilestoprocess – (in this one, we are going to upload the zip files that we need to process)
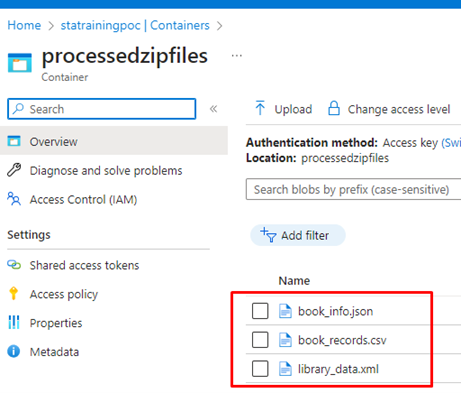
- processedzipfiles – (in this one, we are going to place the unzipped files from the zipfilestoprocess container)
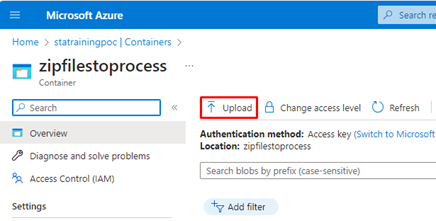
- Now click on the zipfilestoprocess container, and you will notice that we have an option inside the container to upload files. We will not upload them now, but keep this information because we will need it soon.
Now, we are ready to create our Logic Apps.
So first, we are going to create a Logic App that has the primary goal of unzipping the files that are inside the container zipfilestoprocess to the processedzipfiles container. To do so, let’s create the first Logic App:
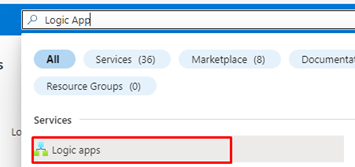
- In the Azure Portal, on the search bar, search for Logic App and click on it
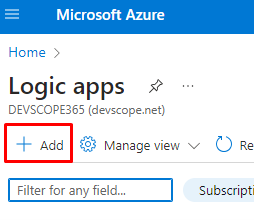
- Next, click on +Add.
- Next, you will have some fields to populate:
- Your Subscription
- Your Resource Group
- Your Logic App Name
- Your Region
- Plan Type
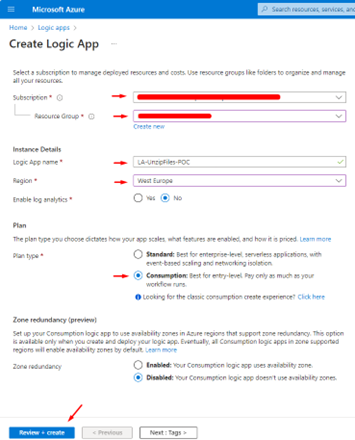
- Next, click Review + Create, wait for the validation, and click Create.
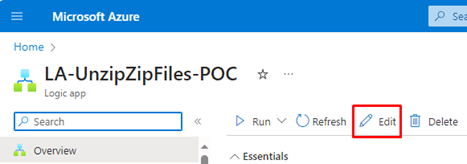
- Now, on your Logic App overview page, click on Edit.
- Next, you need to choose a template to start your Logic App, but since we want to do something more customized to our scenario, let’s click on Blank Logic App.

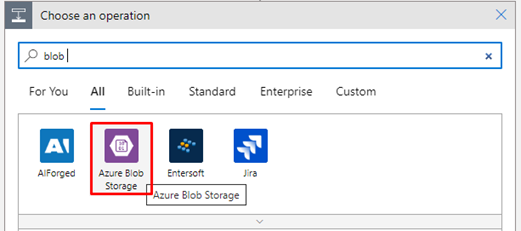
- Now, it’s time to choose the trigger for this Logic App. The goal is to activate the Logic App and commence the file unzipping process whenever zip files are added to the zipfilestoprocess container. So, as for the trigger search for Azure Blob Storage.
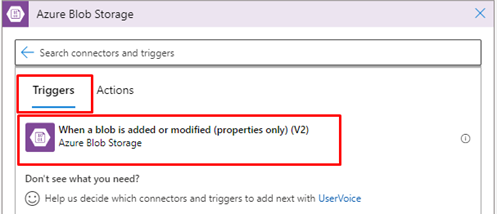
- Next, choose the Trigger: When a blob is added or modified.
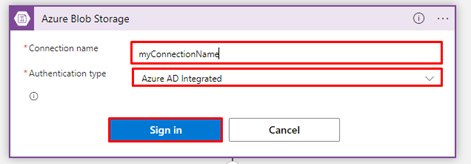
- Next, you will need to do some authentication, and we recommend you select the Authentication Type – Azure AD Integrated. Choose a name for your Connection and click on Sign in. It will require your credentials.
- Next, your connector authentication is configured. It is now time to configure the connector itself. To do so, you must:
- Provide the name of your Storage Account (the one where you created the Containers).
- Also, you need to choose the container you want to trigger the Logic App, in this case, the zipfilestoprocess container.
- As for How often you want to check for items property, let’s make it 30 seconds.

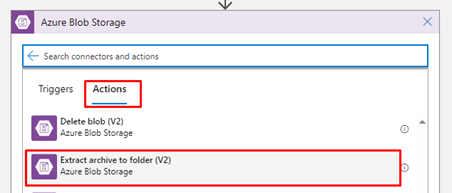
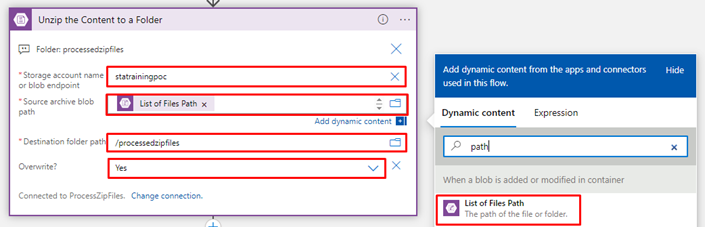
- Now, add an action from the Azure Blob Storage and select Extract archive to folder as the action.
- Configure this action by providing:
- The name of your Storage Account.
- For the Source archive blob path property, you can dynamically select the List of Files Path and choose the destination folder, which in our scenario is the processedzipfiles.
- As for the option Overwrite, select – Yes.
- If you save your Logic App, this is enough to make the unzip process work, and you will notice that:
- If you upload the Zipped files into the container zipfilestoprocess

-
- They will be unzipped in the container processedzipfiles.
For now, the Logic App looks like this:
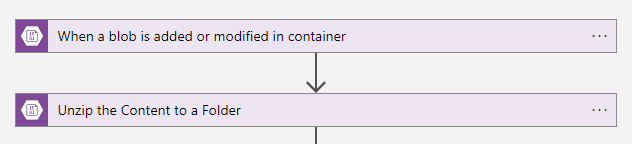
We will return to this LA and add more logic, but for now, this is our Logic App and for what we propose to do (unzip files). It acts as the BizTalk Server received pipeline, but instead of publishing the messages to the MessageBox, it will save it to a blob container.
Now, we need to create another Logic App, a child Logic App, to process each file individually. We named it LA-ProcessUnzipedFiles-POC:
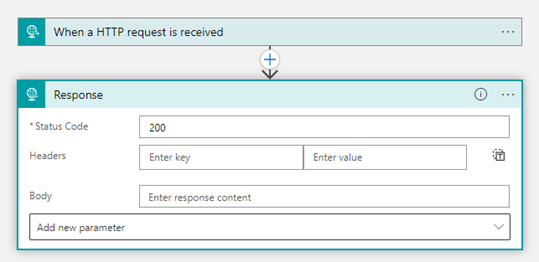
- Let’s start with the trigger When a HTTP request is received and a Response action with the Status property set to 200.
- Now we need to add an Initialize a variable action (optional)
- On the Name property, set FileContent
- On the Type property, set string.
- And for the body, dynamically select it from the trigger.
- Next, add another action to the Logic App, precisely a Parse JSON action. For the content, select the Headers, and for the schema, click Use sample payload to generate schema and copy and paste the bellow structure:

{
   "headers": {
      "Name": "book_info.json",
      "Accept-Language": "en",
      "User-Agent": ""xxxxxxxxx",
      "x-ms-workflow-id": "xxxxxxxxx",
      "x-ms-workflow-version": "xxxxxxxxx",
      "x-ms-workflow-name": "LA-UnzipZipFiles-POC",
      "x-ms-workflow-system-id": "xxxxxxxxx",
      "x-ms-workflow-run-id": "xxxxxxxxx",
      "x-ms-workflow-run-tracking-id": "xxxxxxxxx",
      "x-ms-workflow-operation-name": "LA-ProcessUnzipedFiles-POC",
      "x-ms-workflow-repeatitem-scope-name": "For_each_File_Unziped_to_Folder",
      "x-ms-workflow-repeatitem-index": "2",
      "x-ms-workflow-repeatitem-batch-index": "0",
      "x-ms-execution-location": "westeurope",
      "x-ms-workflow-subscription-id": "xxxxxxxxx",
      "x-ms-workflow-resourcegroup-name": "xxxxxxxxx",
      "x-ms-tracking-id": "xxxxxxxxx",
      "x-ms-correlation-id": "xxxxxxxxx",
      "x-ms-client-request-id": "xxxxxxxxx",
      "x-ms-client-tracking-id": "xxxxxxxxx",
      "x-ms-action-tracking-id": "xxxxxxxxx",
      "x-ms-activity-vector": "IN.0H.IN.1F",
      "Content-Type": "text/plain; charset=utf-8",
      "Content-Length": "333"
   }
}
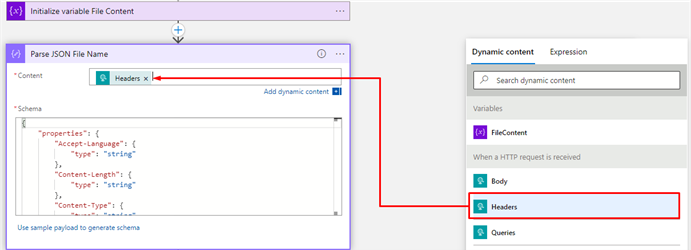
Note: The key information we need access to is the Name field. This way, you can extract the file name for further processing in your Logic App.
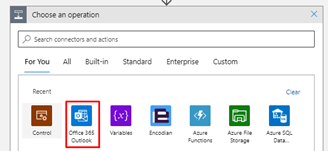
- Now you can add another operation, this time the Office 365 Outlook.
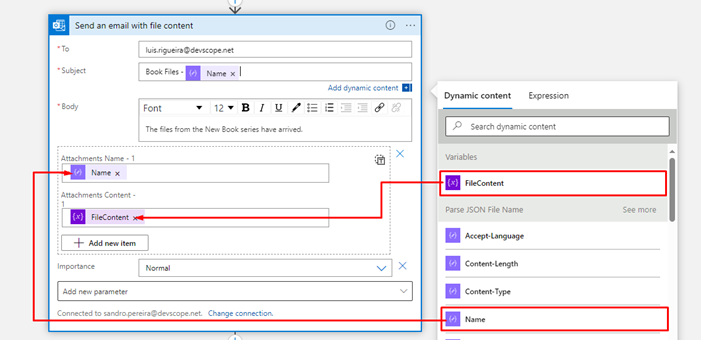
- As for the action, select Send Email, configure the authentication of the connector with your credentials, and as for the connector itself, choose an email to where you want to send your files.
- Choose a subject like Book Files, and you can dynamically choose the name from the Parse Json, ending with Book Files – Name.
- Next as for the body, you can write something like The files from the New Book seriers have arrived.
- As for the attachements you are required to add a name, and a content, so as for the name, again dynamically select the Name from the Parse Json, and as for the Content select the FileContent from the variable we created earlier.
- In the end this is how your child Logic App should look like:
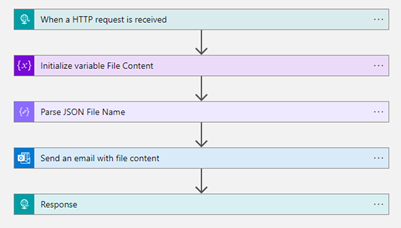
- Save this logic app and return to the previous one.
Now, back to our main Logic App:
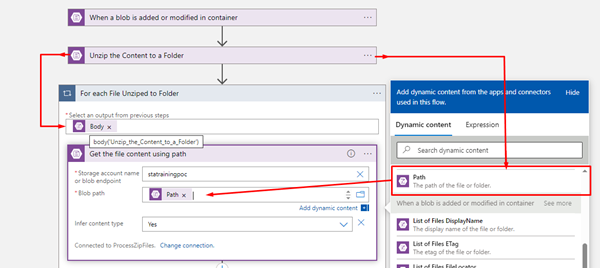
- After the Unzip the Content to a Folder action, add another action, this time one for each statement.
- You will need to select an output from the previous steps, and as for the output from the previous steps, select the Body from the Unzip the Content to a Folder.
- Next, still inside the For Each, add another action, this time a Get the file content using path.
- Again, populate the first field with your Storage Account name, and as for the Blob path, dynamically choose the path from the previous action. What this would do is get the content of each individual file that is unzipped in the container processedzipfiles.
-
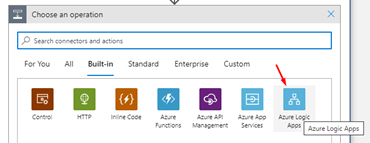
- Next, still inside the For Each Loop, add a new action, this time a Logic App call, and to do so, select the Azure Logic Apps operation.
-
-
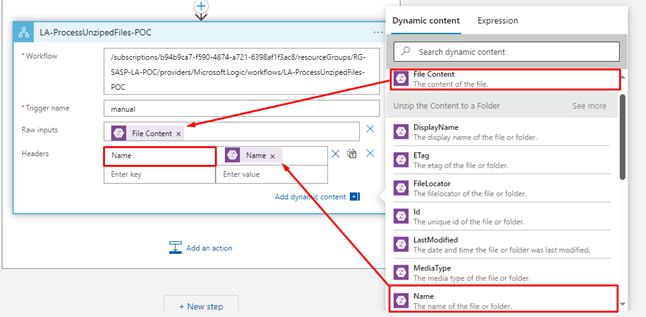
- As for the Logic App, please select the one that we created.
- To configure the Logic App to achieve this, dynamically select the File Content in the Raw Inputs. This ensures that the content of the file is passed as intended.
- Next, include a value in the Headers to transmit the file’s name. This is important as it allows us to retrieve both the name and the file extension in the Headers when passed to the child logic app.
-
- Save your main Logic App. This is how our Main Logic App should look like:
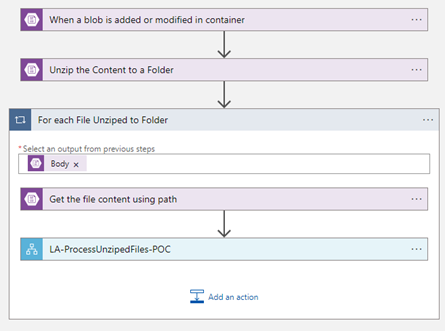
This Logic App is now acting as the BizTalk Server received pipeline by unzipping the files and sending them individually to be processed.
If we now enable our Logic Apps and submit or process the zip file, we can look at the runs, and we will see that we have three individual runs, each one for each file.

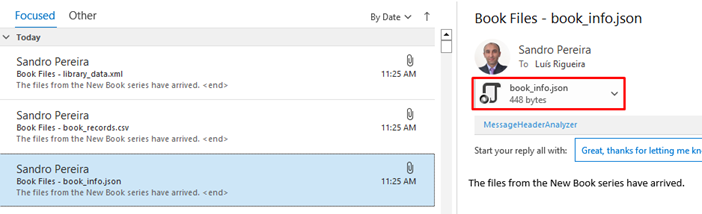
Next, as you can see, we are receiving an email with the files that have been processed:
- The .xml
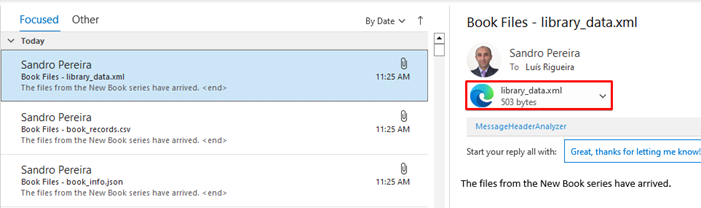
- The .csv
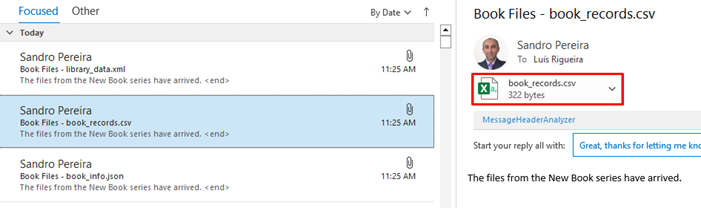
- The .json
This Proof of Concept (POC) demonstrates a straightforward process: unzipping files from one container to another with Azure Logic Apps and then individually processing those files. The goal was to showcase a simple and effective workflow for handling file extraction and subsequent processing within the Azure environment.
Once again, big thanks to Luis Rigueira for helping me create and test this solution.
I hope you find these architecture samples useful, and stay tuned for more BizTalk Server to Azure Integration Services.