There is no doubt that organizations have a difficult task to address the current requirements for building and managing APIs, especially if they don’t use tools like API Management. APIs require up-to-date and strong documentation, increased security levels, comprehensive testing, routine versioning, and high-reliability to be appropriately utilized.
Today we will continue to address how you can easily document your API operations without requiring the traditional Word/PDF documents that can quickly become deprecated and obsolete. In the previous post, we address:
- The global API Description
- And the API Operation Description
In this blog post, we will be addressing Tags and Headers.
API Tags
Well-defined naming and metadata tagging conventions help to quickly locate and manage your resources, in this case, related API’s and operations. This will be quite useful once the number of the exposed API’s and operations increase inside your organization, helping you identify your API’s or operations quickly.
By default, and if you did not add any tags in the API’s initial creation, no tags are assigned.
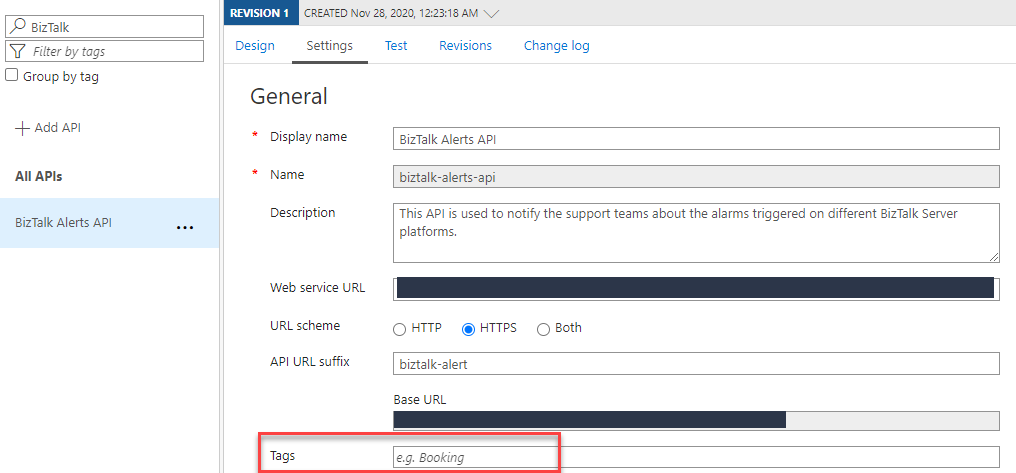
We can always change this behavior by:
- Access to your APIM on the Azure Portal.
- And on the left menu, under the APIs section, click the APIs option.
- Select the API, in this case, BizTalk Alerts API, and click Settings.

- On the Settings panel, on the Tags attribute, start adding tags that can easily define the goal of the API. For example:
- BizTalk
- Monitoring
- POC
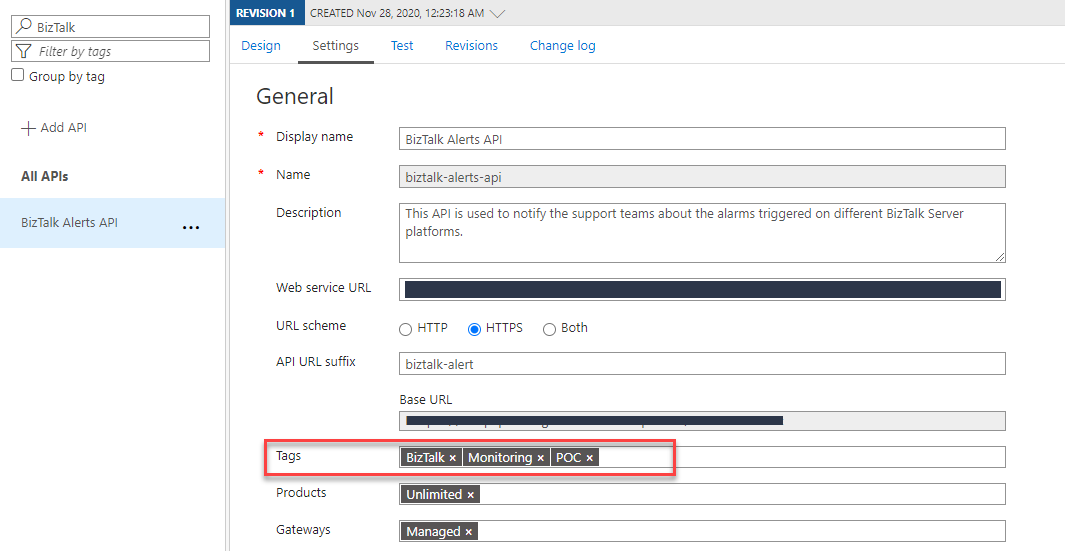
- And then click Save
This basically tells me that this API is a proof-of-concept to monitoring the BizTalk Server platform.
API Operations Tags
Once again, well-defined naming and metadata tagging conventions help to quickly locate and manage your resources, in this case, related API’s and operations. This will be quite useful once the number of the exposed API’s and operations increase inside your organization, helping you identify your API’s or operations quickly.
Again, by default, and if you did not add any tags in the API Operation initial creation, no tags would be assigned.
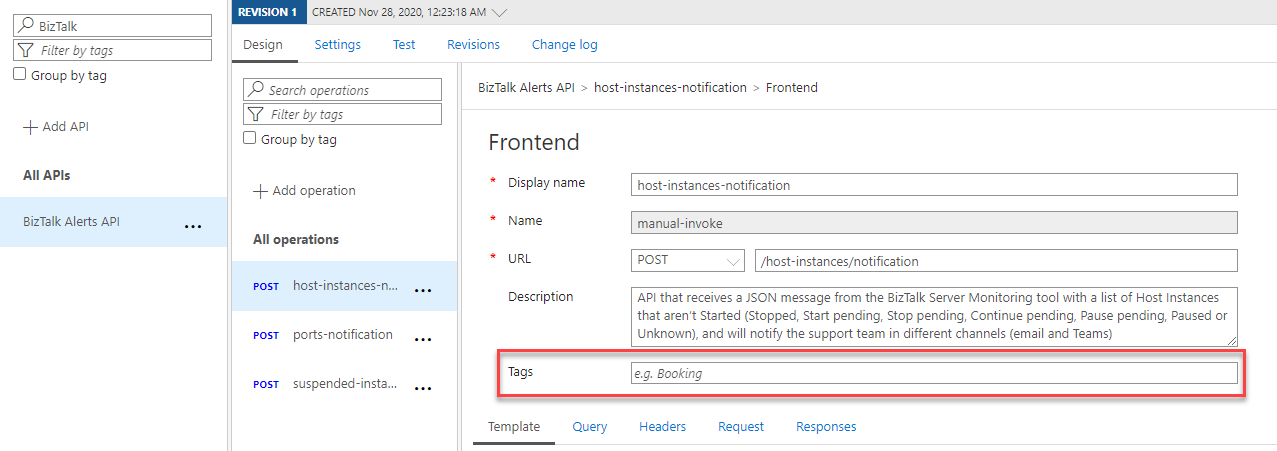
To improve this experience we need to:
- Access to your APIM on the Azure Portal.
- And on the left menu, under the APIs section, click the APIs option.
- Select the API, in this case, BizTalk Alerts API, and on the Design panel select your operation, let’s start to select the first one host-instances-notification and then click Open form-based editor to edit the Frontend settings.

- On the Frontend panel, on the Tags attribute, start adding tags that can easily define the goal of the API. For example:
- BizTalk
- Monitoring
- Host-instances
- Stopped
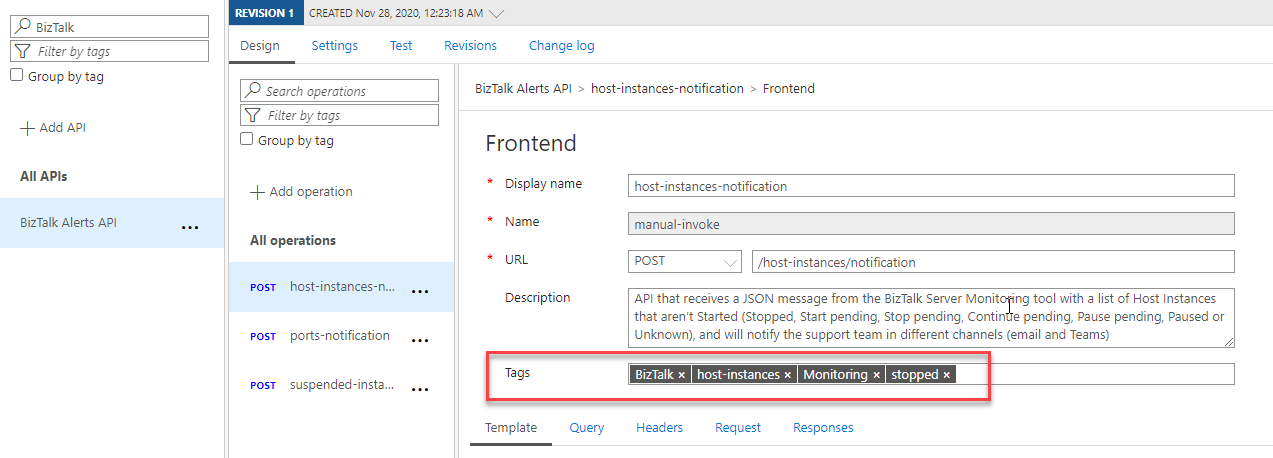
- And then click Save.
- Do the same for the other two operations.
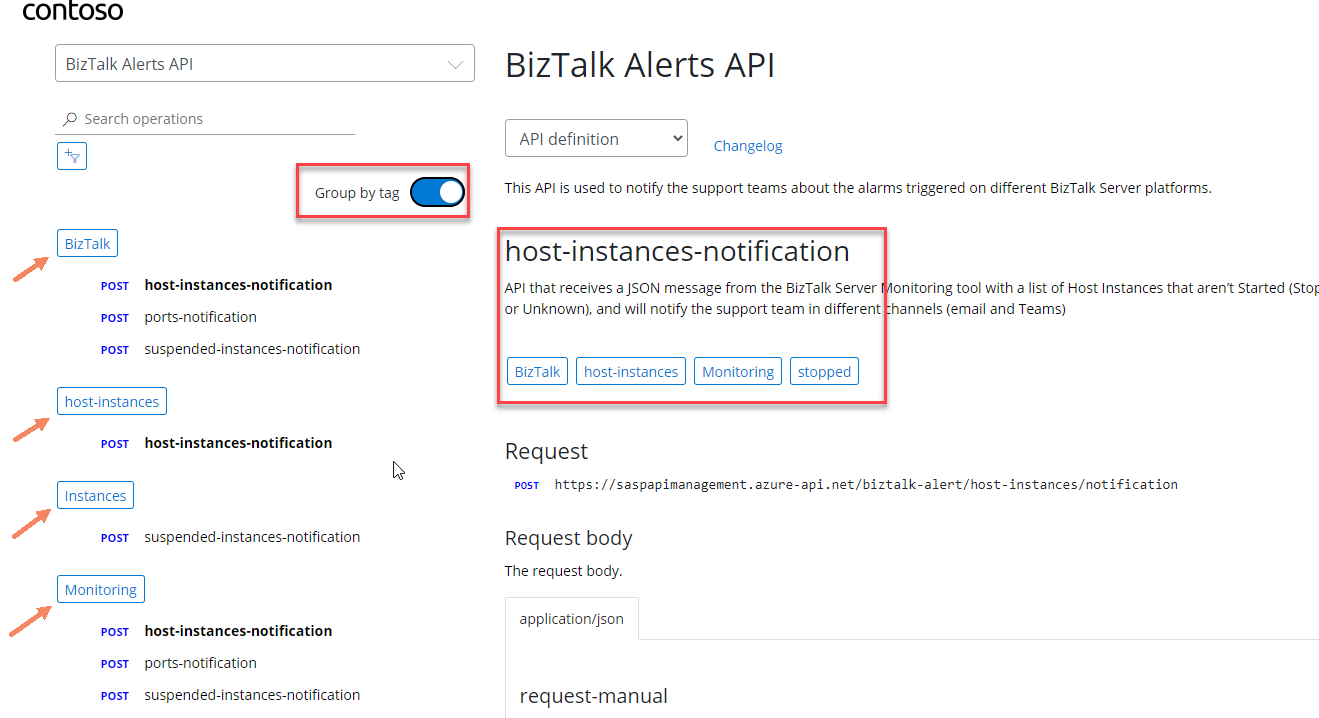
This basically tells me that this Operation is to monitor the stopped host instances from the BizTalk Server platform. Now anyone who enters on the developer portal, a new partner, a new developer, etc., knows also exactly what these operations are for and can easily group operations by tags. Simple and easy, don’t you think?
Operation Headers
HTTP headers let the client and the server pass additional information with an HTTP request or response. There are a variety of standard headers from Authentication header, Caching to Message body information header, and many others. If you know the mandatory and optional headers required by your operation, why don’t you specify them? This will save a lot of time and help the normal painful process for a new developer to know and start using new APIs.
To improve this experience we need to:
- Access to your APIM on the Azure Portal.
- And on the left menu, under the APIs section, click the APIs option.
- Select the API, in this case, BizTalk Alerts API, and on the Design panel select your operation, let’s start to select the first one host-instances-notification and then click Open form-based editor to edit the Frontend settings.

- On the Frontend panel, select the Headers tab, and from the Headers panel, click + Add header
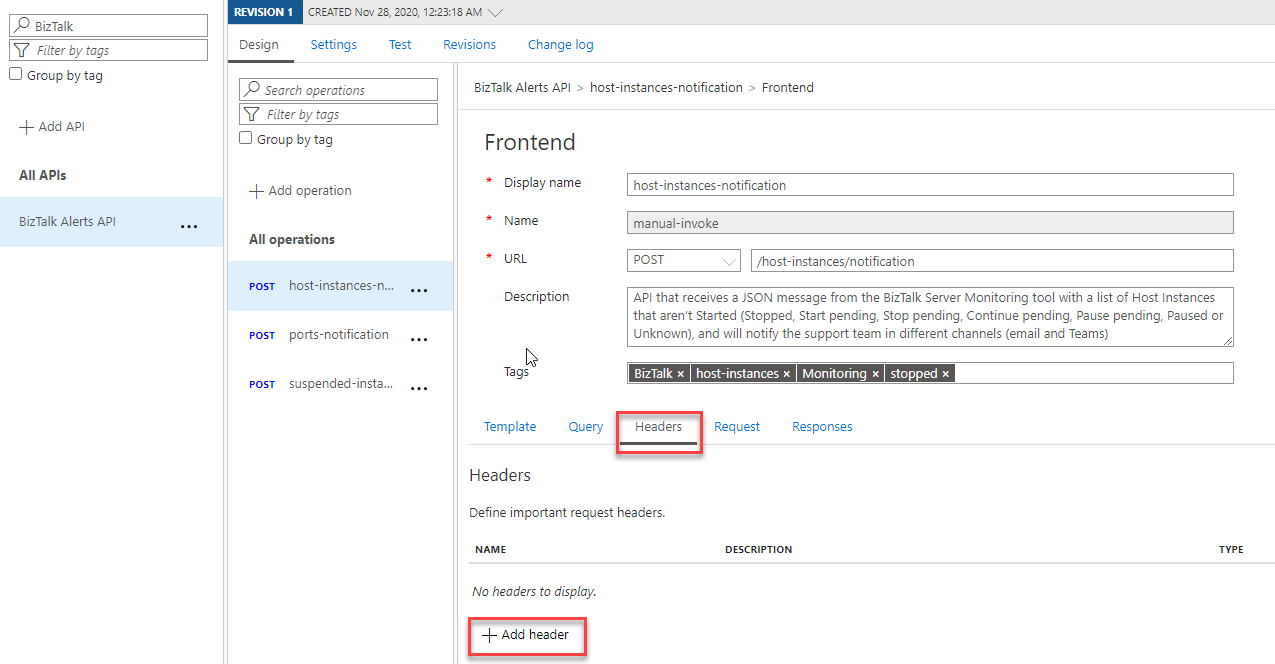
Note: This should be the list of request headers.
- And from the table, add the header information, for example:
- Name: Content-Type
- Description: Indicates the media type of the resource. (optional)
- Type: string (optional)
- Values: From the list, select + Add value, and enter the value application/json and select this vale as default
- Note: you can add several options if that makes sense to your operation.

-
- Required: True
- Add more headers to your operation if that makes sense.
- And then click Save.
- Do the same for the other two operations.
Once again, anyone who enters on the developer portal, a new partner, a new developer, etc., knows exactly what these operations require in terms of request headers for each operation.
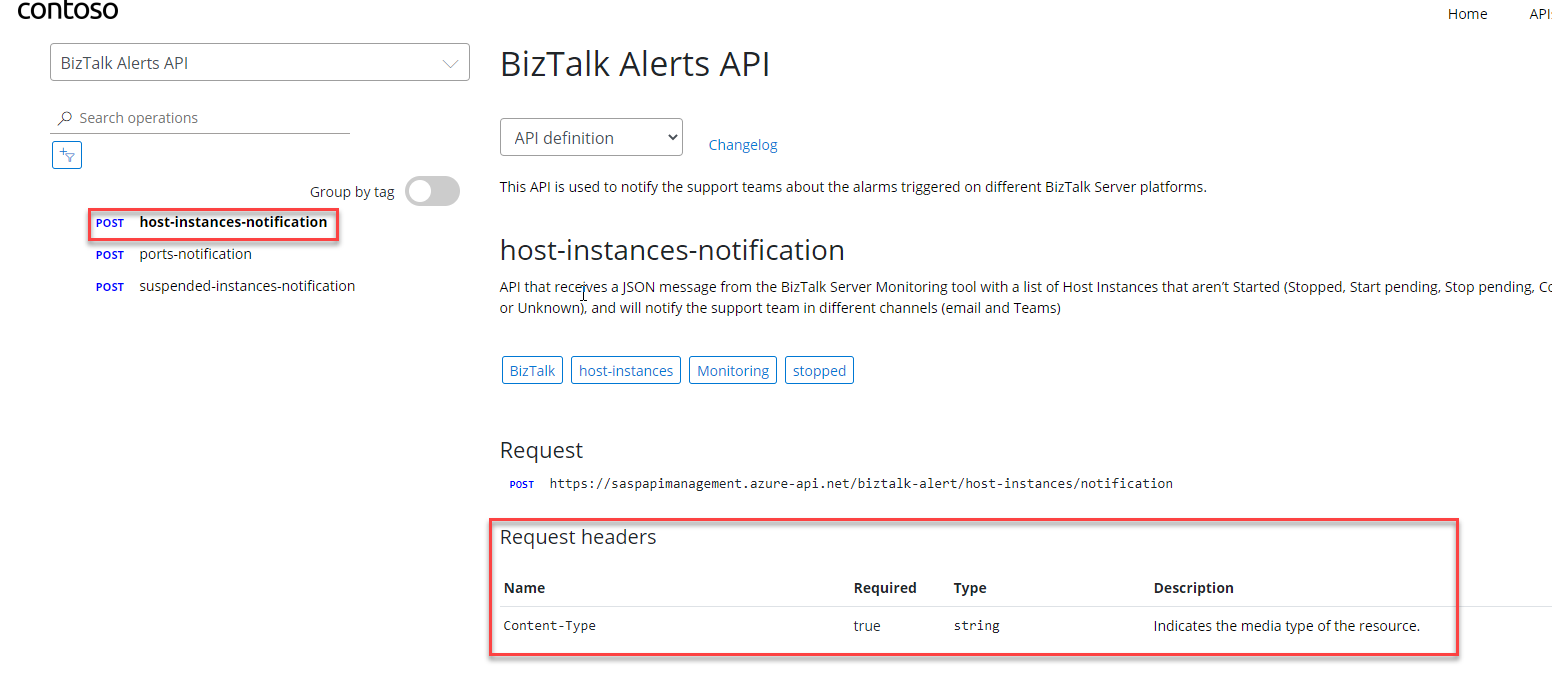
And if you try the operation directly from the Developer Portal, the request header will be automatically added and filled with the default value. The user will also have the option to see what values are supported for each header. In this case, only allows application/json.

Simple and easy, don’t you think?
I hope you are enjoying and stay tuned for the next blog post where we will address Requests and Responses!


