This blog is an extraction of the session “Improve your API’s with RBAC security” presented by Mattias Goldberg at Integrate 2020.
Introduction
API Management in Azure provides an overall access to all the API’s present under it. But this is not a very useful method. We won’t want everyone to access every API’s. In this session we will see how to use Role Based Access Control (RBAC) to provide different levels of access to different consumers of the API.
What is Role Based Access control
Let us consider that you have 4 API’s to perform different actions and you want to restrict certain consumers from consuming certain API’s and allow certain consumers to consume certain API’s. This can be achieved using Role Based Access Control.
How to use Role Based Access Control
Role Based Access Control can be provided by using the Azure Active Directory, which is a part of Azure, and other RBAC providers such as Auth0. Here we will see how to use RBAC using Auth0.
RBAC using Auth0
In Auth0 we have two options that we will be using for RBAC. One is Applications and the other is API’s. The Applications section will contain all the consumers of our API and the API’s section will contain our API’s and their respective properties such as permissions. The below image shows how Auth0 looks like and the two options we will be using for RBAC.
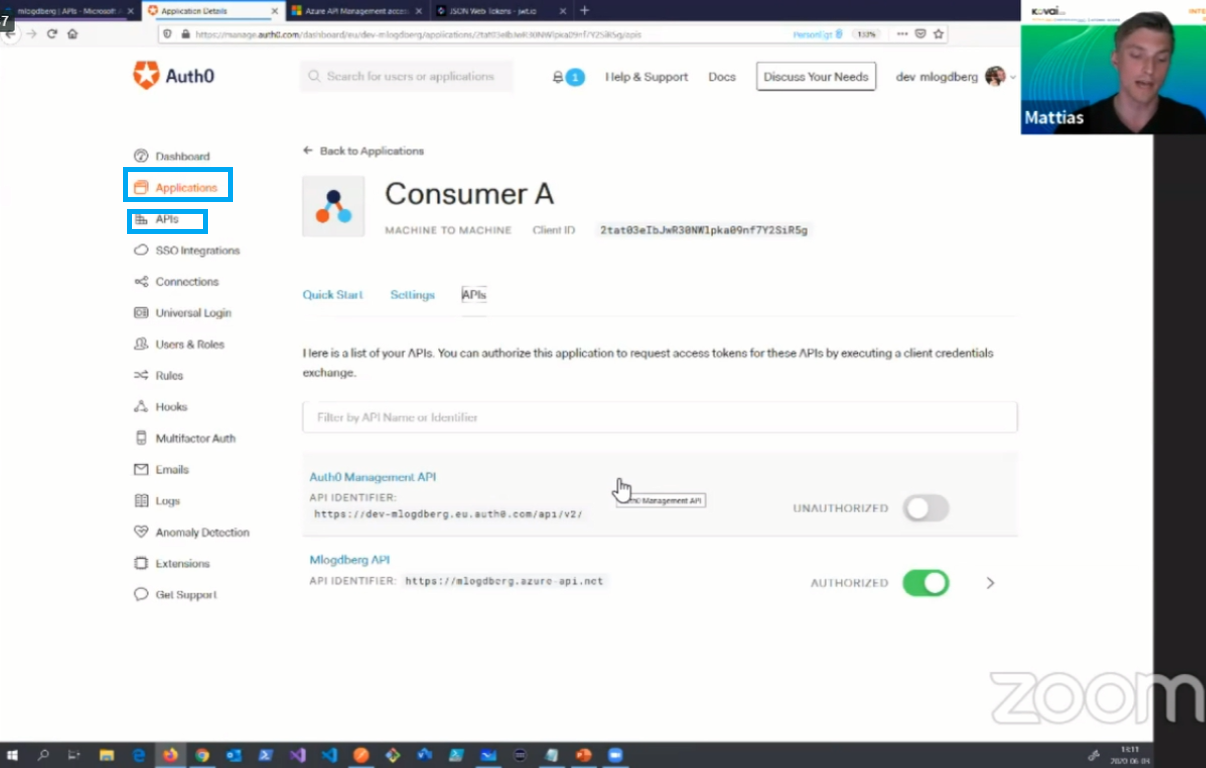
How to use Auth0 in Azure API Management
Using Auth0 in Azure API Management is very simple when compared to using RBAC provided by Azure AD.
To use Auth0 in a request:
- Go to your Azure API Management and select the API you want to use
- Select a request under the API to which you want to provide RBAC
- Now select Policies under Inbound Processing
- Specify the open id config URL under the validation section of the Policies
- Specify the Audience URL under the validation section of the policies
- Specify the issuer URL under the validation section of the policies
Once the above process is complete, the policies will look like the image given below:
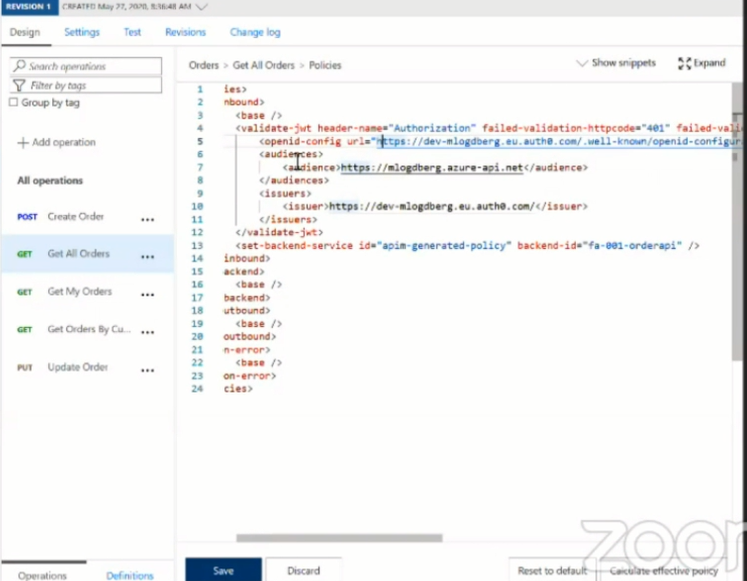
The above process includes the Auth0 token to the API request. Now let us see how to use RBAC for this request. To configure RBAC for the request, follow the steps given below:
- Add a tag called required claims under the validation section of the policies
- Now specify the name of the claim that you are looking for in the token and add the value you are looking for in the token.
- Click Save to save the policy
Once the above steps are done, the policy will look like the image given below:
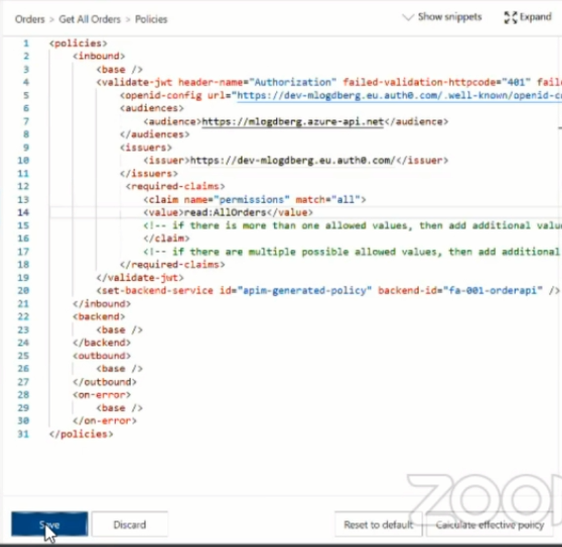
How RBAC is implemented using Auth0
From the above information, we can understand how to use RBAC in API’s. Let us see how RBAC works. The work of Auth0 in providing RBAC to our API is to generate an encrypted token which contains all permissions that are provided to a user. We can decode the JWT token provided by Auth0 to get the permissions that the consumer has.
Under the settings section of the API’s in Auth0 you can find the options to enable RBAC and include permissions in header options. Enable these options to use RBAC using Auth0.
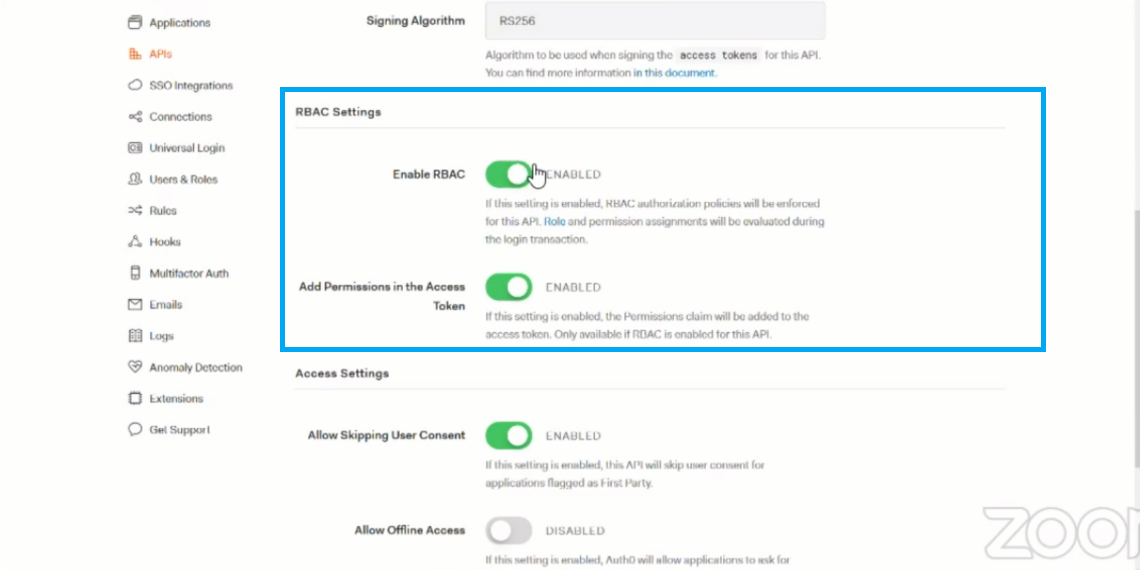
Once these options are enabled, the permissions configured for the consumer will be encrypted in the JWT token provided for Authorization. The below image shows the decoded JWT token in which you can see the different permissions configured for the consumer.
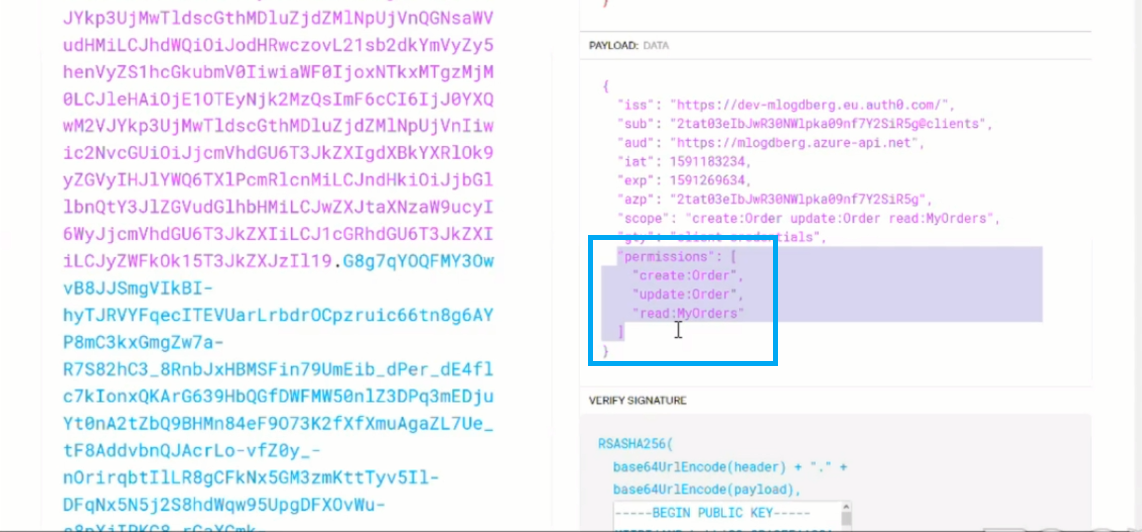
These permissions can be accessed under the claims section of the decoded API token using which the user is allowed or denied access to an API. You can add various permissions to a single user and allow the user to access various requests in an API. The users who don’t have the requested permission are denied access to the API request. This is how RBAC provides Role Based Access Control to API’s under API Management in Azure.
Wrap Up
In this blog post we discussed about how Role based Access Control helps us in securing our API’s by providing restricted access to certain users using Auth0. Auth0 makes RBAC very simple and easy to configure. Stay tuned for further updates on RBAC. Happy Learning!


