Microsoft Azure is one of the diverse cloud platforms available today. It gives many helpful services for businesses of all sizes. But, when an organization grows its cloud usage, then managing costs becomes an issue.
Microsoft Azure cost optimization is not just about reducing costs. It is about getting better performance & efficiency while staying under budget.
Right here, this blog is your go-to guide in Azure cost optimization strategies and ways to save your money. Let’s see how you can make the most of your Azure resources.
📝 TL;DR: One-Minute Brief
Azure cost optimization isn’t just about cutting costs—it’s about spending smart to align cloud investments with business goals.
- Rightsize your VMs & storage – avoid overprovisioning
- Use Reserved Instances or Savings Plans – save up to 80% on long-term workloads
- Tag, group & track usage with Azure Cost Management + Azure Monitor
- Catch spikes early with budget alerts and usage tracking tools
- Deallocate idle resources or set smart start/stop schedules with tools like Turbo360
- Leverage Azure Hybrid Benefit – reuse on-prem licenses to cut Windows/SQL costs
- Automate scaling and optimize storage tiers (hot, cool, archive)
- Spot VMs for non-critical jobs = huge savings with a little risk
- Use Azure Advisor – get AI-driven, free cost recommendations
- Use test pricing & serverless for dev workloads
- Enable RBAC to limit unnecessary provisioning
Turbo360: Best for Azure-centric orgs to manage cost spikes, schedule non-prod shutdowns, and automate idle resource cleanup
Other Tools: Azure Cost Management, Azure Advisor, Azure Pricing Calculator, Azure Monitor, Azure Automation, Azure Savings Plan
What is Azure Cost Optimization?
In this cost optimization, we mainly reduce unnecessary expenses on Microsoft Azure services. And we make sure that cloud infrastructure meets our business needs.
It involves monitoring resource usage, taking advantage of cost-saving tools & practices. And by this, you can also consistently refine your cloud setup to avoid extra spending.
Effective Azure cost optimization can result in essential savings & improved operational efficiency. With the correct approach, you can align your cloud investments with your business goals. This will ensure you pay only for what you use.
Reasons to Optimize Azure Costs
Let’s see some reasons why you should optimize Azure costs:
1. Reduce Unnecessary Expenditure
Cloud bills can easily go out of control if resources are not managed carefully. Many organizations pay for services they no longer use. Optimizing Azure costs helps identify this waste, this also makes sure that your budget is used for what truly matters!
2. Improve Resource Utilization
When resources are not used properly then you are basically overpaying for capacity you don’t need. Because correct size involves matching resources as per the requirements of your applications.
Regular monitoring makes sure that we use resources to their full potential to improve and cut back costs.
3. Enhance Business Agility
Businesses can use funds to optimize costs in a strategic way. By developing new products, scaling existing services, or exploring innovation.
Lowering financial pressure makes it easier to adapt to market changes. Invest in growth opportunities without adjusting much on stability.
4. Return on Investment Increase
Every dollar used on Azure should bring measurable value to your business. Cost management ensures you are not just spending less but more out of your invested amount.
By mixing your cloud spending with your business goals. So that you can get best outcomes & high returns on your investment.
5. Sustainability
Better resource usage does not just save money. It also lowers your carbon footprint. Azure works on energy-intensive data centers. Reducing unnecessary usage also helps in saving energy.
This merges sustainability goals with the organization’s commitment to environmentally responsible practices.
Strategies for Azure Cost Optimization
Let’s understand some good strategies for Azure cost optimization:
- Azure gives a diverse range of virtual machine sizes & storage options. Rightsizing involves selecting VMs & storage configurations that match your workload requirements. You can use tools like Azure Advisor to identify less useful resources.
- Azure reserved offer significant discounts for committing to one or 3-year plans. By forecasting your usage & choosing reserved instances you can save up to 70% compared to pay as you go pricing.
- Automatic scaling adjusts resources based on demand, making sure you pay only for the capacity you need. Load balancing distributes traffic efficiently, optimizing performance & reduce costs.
- If you already have an on-premises Windows server, then Azure Hybrid Benefit allows you to use these licenses on Azure. This lowers the cost significantly.
- Use cost management + Azure monitor to track your usage patterns and identify cost-saving chances. Consistently review your resources to eliminate unused services.
Azure Cost Optimization Best Practices
Here are some of the best Azure cost optimization practices for you:
1. Identify & Re-allocate Idle Resources
Unuseful resources like unused virtual machines, storage accounts, and IP addresses. This can increase your Azure costs. These resources often remain allocated due to oversight. Especially in environments with numerous projects or teams.
Do regular audits to pinpoint resources that are no longer in use. E.g., if a development virtual machine is no longer needed, re-allocate it immediately.
You can use Azure Cost Management and Azure Advisor to identify less useful resources. Re-allocate or delete them to avoid paying for unused capacity.
2. Understanding the Resources by Tagging and Grouping
Azure Resource Groups are containers that hold related resources for Azure solutions. Creating resources under proper and more petite Resource Groups will help the users understand the purpose of the resources, which also helps in cleaning up the resources related to a new solution.
Many users need help creating proper Resource Groups before adding resources. As this is a one-time process, you can only do a little with the existing resources that are not grouped during the creation. For such scenarios, Azure Tags will be the right solution.
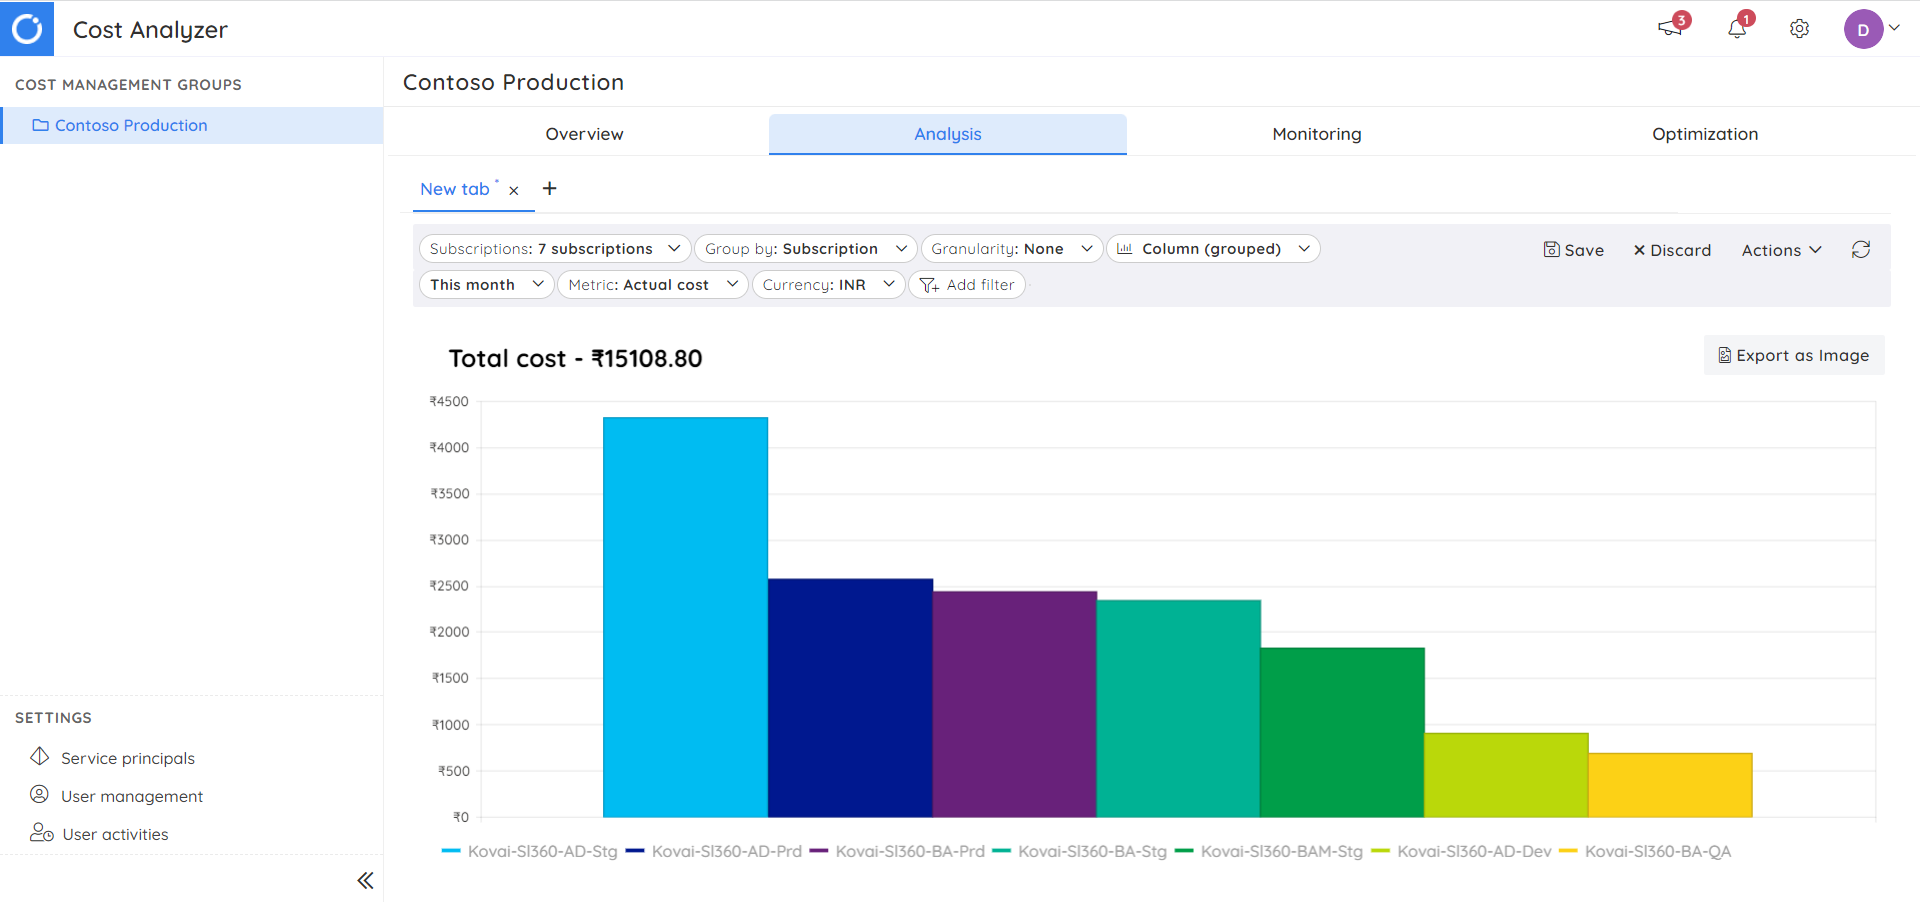
Once the resources are correctly grouped, it is easy to understand how the cost is distributed across the solutions. Visualizing and getting insights based on filters like Resource Groups, Types, Regions, and Tags are available at each Subscription level in the Azure Portal.
Tagging is a simple yet powerful way to organize and manage Azure resources. By adding metadata tags like department, project, or environment. To each resource, you can track and allocate costs more effectively.
For example, a tag like “Project: A or B” helps you identify the resources consumed by a specific project. Azure’s tagging system supports detailed cost analysis, making it easier to budget & monitor expenses.
3. Monitor the Cost and Act on Unintentional Spikes
Once you understand how the resources are distributed across multiple solutions and the cost it incurs, the next step is understanding the daily spent rate of your Azure subscriptions.
You can calculate the daily spent rate by taking the average day-wise cost for the last 7 days. Cost spikes due to yearly renewals like App Service certificates should be excluded so that you can arrive at the exact rate.
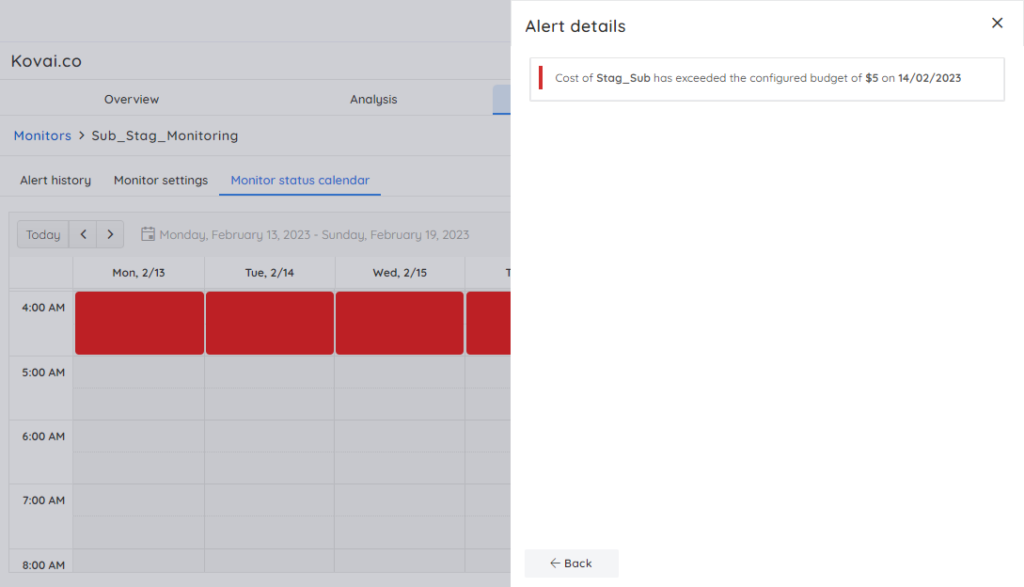
You can create budgets in the Azure portal or other third-party tools at a Subscription level. It would help if you had tools that support monitoring the cost at multiple Subscription levels.
Once the monitor is set up, you will be alerted whenever something goes off the chart. You can immediately check which resource contributed to the raise and act on it. If the raise is valid and the resources are created or scaled intentionally, you must calculate the daily spend rate again and monitor it. There are Azure cost management tools which can be used to alert if the cost trend changes automatically.
4. Identify and Remove the Idle Resources
While grouping the resources using Resource Groups and Tags, you could have identified the resources that serve no purpose and can be deleted immediately. For example, most of the time, disks associated with the VMs will be left idle while deleting the VMs; you can delete those disks.
You can find the unidentified idle resources by analyzing the consumption metrics like CPU and Memory percentage. You can remove the resources with zero consumption.
Read more: How to auto-shutdown idle Azure VMs to maximize cost savings?
5. Reservations
Azure Reservation is one big area where you can save up to 80% on the cost spent on resources. Microsoft Azure discounts resources based on usage commitment declared for 1 to 3 years. Reservation is not just about discounts; you can get a high-performing machine at a shallow price point.
6. Azure Savings Plan
Azure Savings plans are, just like reservations, a recent addition. You need to commit to the fixed hourly spent for 1 to 3 years and get up to 65% discount on it.
For Reservations, you need to select the VM sizes upfront for 3 years, which might be challenging for growing businesses as changing the size of the VMs in reservations comes with a hard limit of only up to $50K per year. Saving plans expect the hourly cost to be committed, and you can create VMs of any size within the committed limit. The Savings Plan is supported for computing resources like Reservations.
Read more: Comparision between Azure Reservations and Azure Savings Plan
7. Enable Azure Cost Alerts
Unexpected rises in costs can also disrupt budgets. Setting up cost alerts ensures you’re notified when spending exceeds predefined thresholds. In Azure Cost Management, you can create alerts based on budgets.
For example, if your monthly budget is $10,000, set an alert to notify you at 80% and 100% usage. These alerts provide real updates, this allows you to act swiftly, like active resources or to stop overspending.
8. Optimize Storage Costs
Azure offers multiple storage tiers specially made from different data patterns: hot, cool, and archive.
- Hot Tier: Ideal for frequently accessed data, though it comes at a higher cost.
- Cool Tier: Suitable for infrequently accessed data, with lower storage costs but higher retrieval fees.
- Archive Tier: Best for long-term storage of rarely accessed data, with the lowest storage costs.
Explore your data’s access patterns and move less-used data to cooler or archive tiers to save costs. Tools like Azure Storage Explorer can assist in analyzing and migrating data between tiers.
9. Implement Autoscaling Policies
Automatic scaling adjusts resource capacity based on workload demand. This means you’re only paying for what you need at any given time.
For example, if traffic to your application rises during the day but reduces at night. Autoscaling ensures that virtual machines scale up during peak hours.
Describe automatic scaling policies in Azure to manage resources. It reduces the need for manual intervention and avoids over-provisioning. This is very effective for applications with variable or seasonal traffic.
10. Use Spot VMs for Non-Critical Workloads
Spot VMs are virtual machines offered at significantly reduced rates compared to standard VMs. These discounts come with the condition that Microsoft can reclaim these VMs with little notice.
While this makes them unsuitable for critical or time-sensitive applications. They are good for workloads that can tolerate interruptions, like processing, data analysis, and testing.
Using Spot VMs for these types of tasks allows businesses to achieve cost savings without losing efficiency.
11. Consolidate Subscriptions
Handling Azure subscriptions across an organization can lead to fragmented billing and missed opportunities for discounts. Merging subscriptions streamlines cost management, simplifies reporting, and enhances visibility.
Moreover, consolidated subscriptions often qualify for volume discounts, reducing the total expenditure. Use Azure Management Groups to organize and manage subscriptions effectively.
12. Smart start/ stop or Deallocate Nonproduction Resources
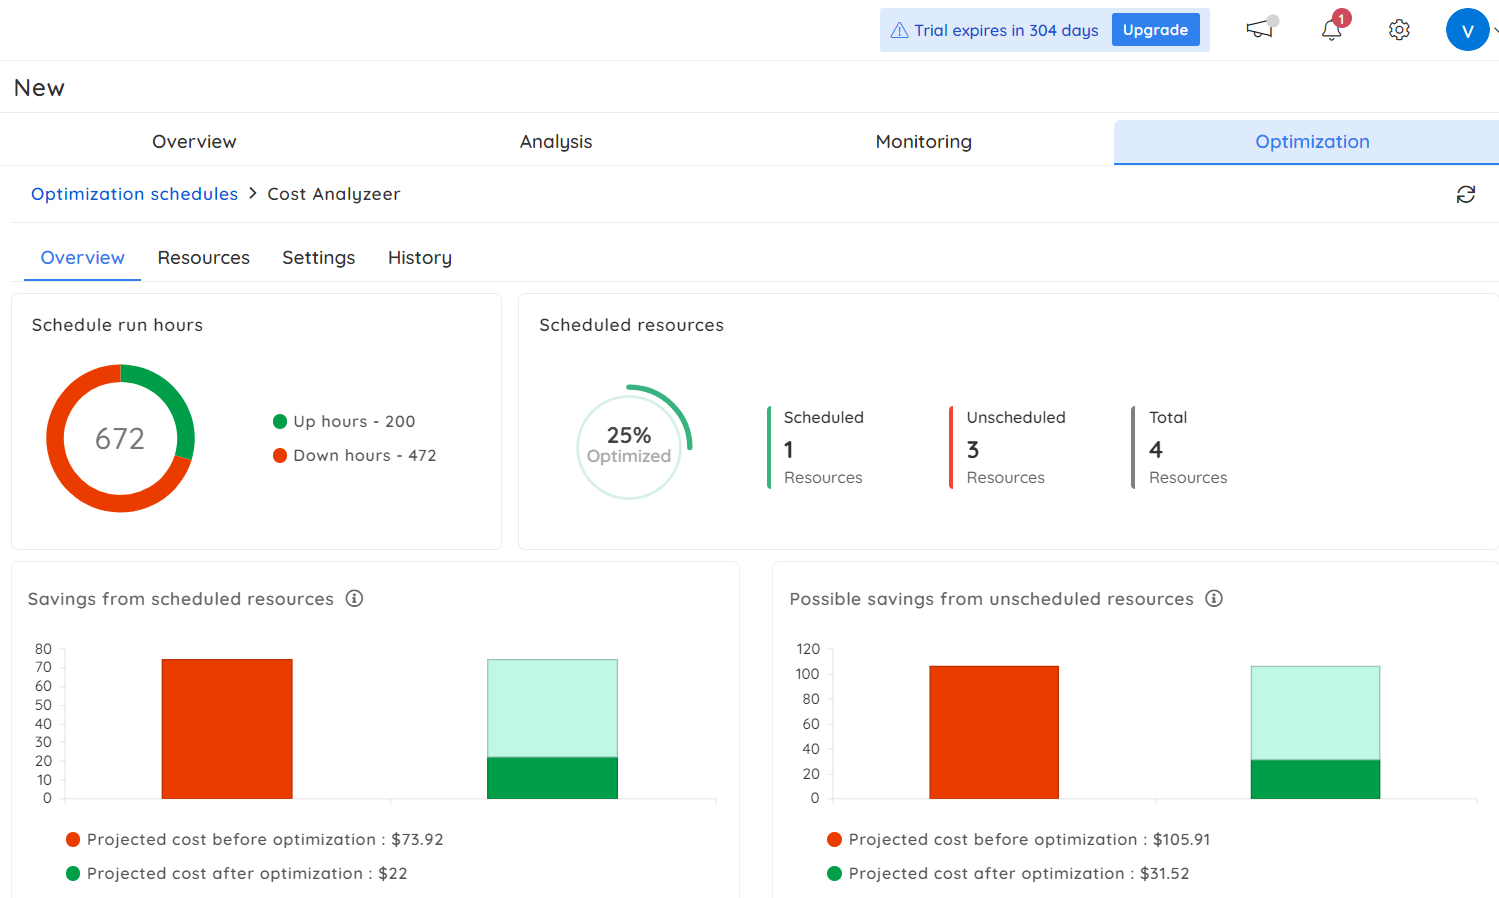
Close to 70% of a month, the resources contributing to the nonproduction environments will run for no reason. Most resources can be stopped, scaled down, or deallocated during off-business hours or weekends, which can be achieved using 3rd party tools like Turbo360.
13. Use Azure Advisor Recommendations
Azure Advisor is a free service that provides suggestions to improve cost efficiency, performance, security, and reliability. It studies your resource configuration and usage patterns.
For example, it may suggest resizing VMs, removing unused resources, or reserving instances. Regularly reviewing and implementing Azure Advisor’s recommendations ensures that you refine your setup for cost savings.
14. Reserve Capacity for Predictable Workloads
For workloads with steady and predictable resource demands. Reserving capacity through Azure’s Reserved Instances or Reserved Capacity plans can lead to cost reductions.
These plans require a commitment of one to three years in exchange for discounts of up to 72% compared to pay as you go pricing.
With your long-term needs and reserving capacity, you can reduce variability in cloud spending and achieve a lower overall cost.
15. Optimize Data Transfer Costs
Data transfer charges can add up quickly. Especially for applications that exchange large volumes of data between Azure regions or with external systems. Minimizing these transfers is essential for cost optimization.
You can reduce costs by keeping resources within the same region whenever possible. Using Azure’s Content Delivery Networks to cache data closer to end users.
CDNs not only lower data transfer costs but also improve application performance by reducing latency. Also, review your data egress patterns to identify and address inefficiencies.
16. Use Test Pricing
Azure offers discounted pricing for development and testing environments through Test subscriptions. These are made for non-production purposes, such as software development & quality assurance testing.
Test subscriptions allow you to experiment and innovate without high costs. With discounted plans, you can save while maintaining environments for creating & testing applications.
17. Enable Azure Hybrid Benefit
The Azure Hybrid Benefit allows you to bring your on-premises Windows Server and SQL Server licenses to Azure. This feature can cloud costs by up to 85% if you already own licenses with Software Assurance.
To use this benefit, ensure your licenses are eligible and activate the feature within your Azure portal. It’s particularly beneficial for workloads like databases and enterprise applications.
18. Regularly Audit Resource Usage
Reviewing periodic audits of your Azure resources helps you uncover hidden costs. Use tools like Azure Monitor and Cost Management to assess the usage and performance of your resources.
You can identify oversized virtual machines, unused storage accounts, or abandoned services. After understanding these things, you can resize or re-allocate resources as needed, ensuring optimal expenditure & eliminating waste.
19. Use Serverless Computing
Azure’s serverless offerings, such as Azure Functions and Logic Apps, provide a cost-effective model for event driven. These services follow a pay as you go model, meaning you only pay for the actual execution of code or workflows.
This eliminates the need to provision and manage servers for tasks that are irregular or uncertain. Serverless computing is good for scenarios like real-time data processing and scheduled tasks.
20. Optimize SQL Database Costs
Azure SQL Database offers flexible pricing models to suit different business needs. Choose the right pricing tier based on your workload’s performance & storage requirements.
For example, use General Purpose for cost-effective production environments for rising massive workloads.
Also, flexible pools also allow you to share resources across many data bases. Optimizing costs when you have variable usage patterns. By examining your database performance metrics, you can reduce expenses.
21. Implement Role-Based Access Control
Role-Based Access Control is a security feature in Azure that allows you to manage who has access to specific resources. By applying RBAC, you can prevent access to resource creation and management based on user roles and responsibilities.
Developers may only have permission to deploy or manage resources within their assigned projects. While administrators keep broader access rights.
This minimizes the risk of unauthorized resource provisioning. Which can especially lead to unnecessary costs. Regularly & consistently review and update access policies to align with organizational changes.
22. Review Third-Party Tools
Third-party tools blended into your Azure environment can sometimes contribute to excess expenses. If they are not actively used or if there are more cost-effective alternatives available.
Do a careful review of all third-party tools to check their usage, necessity, and pricing. For instance, some tools may offer overlapping functionalities with built-in Azure services.
In such cases, transitioning to native Azure tools can save money while maintaining functionality. Keep a list of these tools and schedule reviews to ensure your integrations remain cost-efficient.
23. Use Azure Pricing Calculator
The Azure Pricing Calculator is an important tool for estimating costs before launching new resources. It allows you to input specific parameters, such as resource type, region, and expected usage, to get a detailed cost breakdown.
This helps you compare different configurations and choose the most cost-effective options. For instance, before starting a new virtual machine, you can use the calculator to compare pay as you go pricing with reserved sample pricing.
Joining this step into your planning process confirms transparency to prevent random cost tips.
24. Schedule Resource Shutdowns
Many Azure resources, such as virtual machines and development environments, are not required to run 24/7. By planning non-critical resources to shut down during off-hours, you can reduce costs.
Azure Automation & Azure Test Labs supply tools to automate the shutdown & startup of resources based on schedules.
For example, development teams can schedule their environments to shut down after work hours and restart in the morning. This practice makes sure that resources are only active when needed, translating to cost savings over time.
25. Regularly Review Licensing Options
Azure offers different licensing plans. Reviewing these options ensures you are on the most cost-effective plan for your needs.
Organizations with high resource use may benefit from enterprise agreements that offer discounts. Also, review your current subscriptions & identify options to join or upgrade to a plan that better aligns with your usage patterns.
Dealing discounts for large usage or exploring special offers for specific services can optimize licensing costs.
Regular reviews ensure your organization’s licensing strategy has cloud consumption patterns.
26. Rightsizing
Provisioning servers in Azure is effortless. Within a few clicks, you can create a machine costing 1000s of dollars, leaving the engineering users to provision more than the required capacity to be on the safer side.
Though the environments will be stable and reliable by hosting in a giant machine, the cost comes as the downside. You can easily consume a significant chunk of the budget allocated by provisioning a few servers. It is always recommended to evaluate resource utilization and right-size them continuously. Azure Rightsizing comes as a feature in many 3rd party tools.
Key Takeaways from Azure Cost Optimization Best Practices
Following the above 10 best practices immensely helps to optimize the Azure cost and have it under full control. But, in real-time, there is this challenge where the person who wants to understand the costs might not have the knowledge to break down the cost data into something meaningful, and the application teams do not have the access or tools to analyze their Azure spend.
Here is where Turbo360 Azure Cost Analyzer enables organizations to tackle this problem from both sides. The application teams can build cost analysis, budgeting, and optimization focused on making sure they are efficiently running their resources. Then they can work with the cost owner to build views which allows them to demonstrate they are being efficient.
This creates an all-around better experience where the application teams can be responsible for their costs, and the cost owner can focus on governance across teams. Cost Analyzer will help break up those silos which lead to zero transparency, inefficiency, and out-of-control costs.
Conclusion
And with this, it’s a wrap on Azure cost optimization is a continuous process that needs regular monitoring and auditing. By using the strategies from this guide, you can reduce your cloud expenses. Also, you can maintain or even enhance performance.
And with this, it’s a wrap on Azure cost optimization is a continuous process that needs regular monitoring and auditing. By using the strategies from this guide, you can reduce your cloud expenses. Also, you can maintain or even enhance performance.
FAQs
1. How do I reduce Azure costs quickly?
Start by rightsizing VMs, removing idle resources, scheduling non-production shutdowns, moving cold data to cheaper storage tiers, and setting budgets to catch spikes early. Tools like Azure Advisor and Cost Management help surface these opportunities. Third party platforms such as Turbo360 can automate actions like scheduling and idle-resource clean-up.
2. How can I find and remove idle Azure VMs?
Check CPU, memory, and disk metrics over time. Azure Advisor identifies low-usage resources, and cost dashboards highlight anomalies. Third party platforms, including Turbo360, help automate shutdown or deallocation for VMs that consistently remain idle.
3. What does rightsizing mean in Azure?
Rightsizing is adjusting VM sizes, databases, and storage tiers to match real workload needs. Azure Advisor recommends smaller SKUs or alternative tiers. FinOps tools like Turbo360 centralize these recommendations across subscriptions and help teams review and apply them.
4. How do Reserved Instances and Savings Plans lower Azure spend?
They offer discounts when you commit to a specific VM size or hourly compute spend for 1–3 years. Use historical usage data to estimate steady workloads before committing. Some tools, including Turbo360, help model utilization and track under-used commitments.
5. How can I avoid waste from forgotten or unused Azure resources?
Delete unattached disks, unused NICs, abandoned IPs, stale storage accounts, and unneeded snapshots. Regular audits and tagging help identify what’s still needed. Platforms like Turbo360 can flag unused assets and map them to the team that owns them.
6. How do I optimize Azure storage costs?
Place frequently accessed data in Hot, move rarely accessed data to Cool or Archive, and delete unused snapshots or replicas. Tools can analyze access patterns; Turbo360 can highlight storage groups with consistent over-spend.
7. How do I prevent Azure cost spikes?
Configure budgets and alerts, monitor daily spend trends, and investigate deviations quickly. Cost-monitoring platforms—including Azure Cost Management and Turbo360—can notify cost owners the moment spend shifts unexpectedly.
8. Why are tagging standards important for cost visibility?
Tags help you allocate costs to departments, projects, or environments. This makes optimization decisions clearer and improves accountability. Turbo360 supports tag-based views but tagging itself is a native Azure best practice.
9. How do I control costs in dev/test environments?
Stop VMs outside business hours, use smaller SKUs, and enable autoscaling. Azure Automation can handle schedules; tools like Turbo360 provide team-based scheduling across multiple subscriptions.
10. When should I consider a cost optimization platform?
When you operate across many subscriptions, need unified dashboards, want automated shutdown/rightsizing workflows, or require business-unit cost views. Turbo360 fits scenarios where organizations want to move beyond manual recommendations to repeatable FinOps processes.


